Dopp Kit with Lining – Tutorial by Ute

ute-doppkit1

Hello my friends! Today, I’m excited to share a tutorial that my dear friend Ute created. When she posted her beautifully made dopp kit as part of the Sewing Happiness Winter Tour, I noticed that she added a lining (the pattern in my book is sans lining to make it extra easy for beginners). I loved that and casually asked her if she’d want to do a little tutorial. She agreed and as usual, she went above and beyond and whipped one up in a jiffy, complete with gorgeous photos (that fabric!!).

Take it away Ute!

*************************************************

I am so excited to share a tutorial with you on how to line the dopp kit from “Sewing Happiness” – or any other boxy pouch. Thank you so much for inviting me, Sanae!

One of the things I made for the Sewing Happiness Winter Tour was the dopp kit as a Christmas present for my father. Since it was intended as a toiletry bag I lined it with coated fabric that it could easily be cleaned and wiped.

At least for me this process was not very intuitive and maybe a little tutorial can help you too!

Let´s go!

ute-doppkit2MATERIALS

  • Two rectangular pieces of fabric for the exterior (I used 15 inches by 10 inches of cotton – linen canvas of Nani Iro “beautiful life”)
  • Two pieces of the same size for the lining (I used water repellent/coated fabric)
  • A zip at least as wide as your fabric or longer (I used a 17-inch zip)
  • coordinating thread

Optional:

  • Interfacing for the exterior
  • Twill tape or other fabric/leather for zipper tabs or handles

CONSTRUCTION STEPS

The first steps are the same as assembling a simple, lined zippered pouch.

ute_doppkit3

Make a “sandwich” by laying one piece of exterior fabric right side up, put the zipper with the teeth down and the pull to the left and layer the lining – wrong side up- on top of it.

Align zipper tape edge and fabric edges. You can let your zip hang over the edge if it is longer.

On top of the lining mark your seam allowance at ½ inch away from the edge at both sides.

ute-doppkit4

Use your zipper foot and sew with a ¼ inch seam allowance. Start and stop where you marked your fabric.

Now flip the fabric so that the wrong sides are facing each other and press away from the zipper.

Take the second piece of exterior fabric, right side up, place the zipper with the teeth down and the pull to the right side and layer the lining – wrong side up – on top of it. Attach zipper like above.

Again, flip the fabrics so that the wrong sides are facing each other and press away from the zipper.

ute-doppkit5

Topstitch along each side of the zipper.

ute-doppkit6

Place exterior and lining right sides together and close the bottom of the pouch.

Leave an opening in the lining or exterior for turning the pouch right side out. I left an opening in the exterior because hand-stitching the coated lining would not have given me nice results.

Center your seams on top of the zipper and put your tab(s)/handles in place, sandwiching them between the exterior layers on one side or both. Pin exterior pieces and lining pieces together.

ute-doppkit7

Starting at the side without the zipper pull, fold back the lining and close the seam, sewing over the zip. I like to use my zipper foot for that.

Repeat for the lining.

For the other side open the zip at least half way and proceed in the same manner.

ute-doppkit8

Trim seam allowances and zip.

Box all eight corners by pinching them so that the seam is in the middle, sew perpendicular to the seam, 2 inches from the tip of the triangle.

Trim seam allowances of all corners. You will now have something looking like this:

ute-doppkit9

Turn pouch to the right side through the opening! You are almost finished!

ute-doppkit10

Now close the opening with a few hand stitches and your pouch is ready to be filled and used!

ute-doppkit11 ute-doppkit12

I hope this was helpful!

*************************************************

Thanks so much, Ute! I gave the tutorial a whirl myself and it was so fun to add a lining, I made three! These are all going to be gifts and I think they’ll be well-received.

ute-doppkit13

As you can see, I played around with the sizing.

ute-doppkit14

I used Nani Iro Water Window in canvas for this one with a softer fusible interfacing meant for quilting, I think. It ended up a little squishy, and for some reason looks longer than Ute’s version even though I used 15″ x 10″ rectangular pieces. A word on adding the handle: I cut a 8-inch piece of webbing and measured 3/4″ from the center of the zip on each side for placement. The handle felt a little too long proportionally for me, so I shortened the next version to 7 inches.

ute-doppkit15

I used most of the last bit of my very favorite Nani Iro cotton for a more petite version. I used this lovely textile for the baby pinafore pattern that I sell in my etsy shop here. I can’t remember exactly how big my fabric pieces were since I was squeezing as much as I could out of the little bit I had available. It was about 10 x 11, I think, so almost a perfect square. It’s adorable!! This is the version with the 7-inch handle. I also used decor weight interfacing for this one, so it has pretty good structure.

ute-doppkit16

For this last version that will be a birthday gift for a friend, I switched up the handle style and simply attached the handle from the outside, as you would a belt loop on jeans. Alright, I admit it, it’s because I forgot to attach the handle beforehand…

This one is slightly smaller than the first one I made (13″ x 10″) and has decor weight interfacing as well. For some reason, K liked this navy graphic fabric a lot and I had some extra, so I made her a dopp kit too, so I guess I sewed 4 in total! I just happened to have the handle strap already sewn because I was going to make a camera strap (also from my book) out of it, but I never got around to it.

All three are lined with dark grey water-repellant fabric used for rain gear, which will make wiping up a breeze. Yay!

I love love love the fabric that Ute used and need to get my hands on it somehow. Anyway, that’s it for the dopp kit tutorial!! Thanks again, Ute!

P.S. Many of you should have received a Secret Valentine Exchange gift by now, but again, please be patient if you’re still waiting for yours. Happy, Happy Valentine’s Day!! I’ll do a full wrap-up next week!


KCW Popular Patterns

2014-kcw-winter-patterns

Today, I’m guest-posting over at the KCW blog. I made a pretty poor showing with only a few items (technically one item) during this esteemed week dedicated to sewing, but I had a great time perusing all of the winter KCW projects, and rounded up some popular patterns. Hope you can check it out!

I’ll try to be back tomorrow with some fun Valentine’s stuff…(it’s starting to get a teensy bit overwhelming behind the scenes)

Happy Friday + Guest Post for Compagnie M
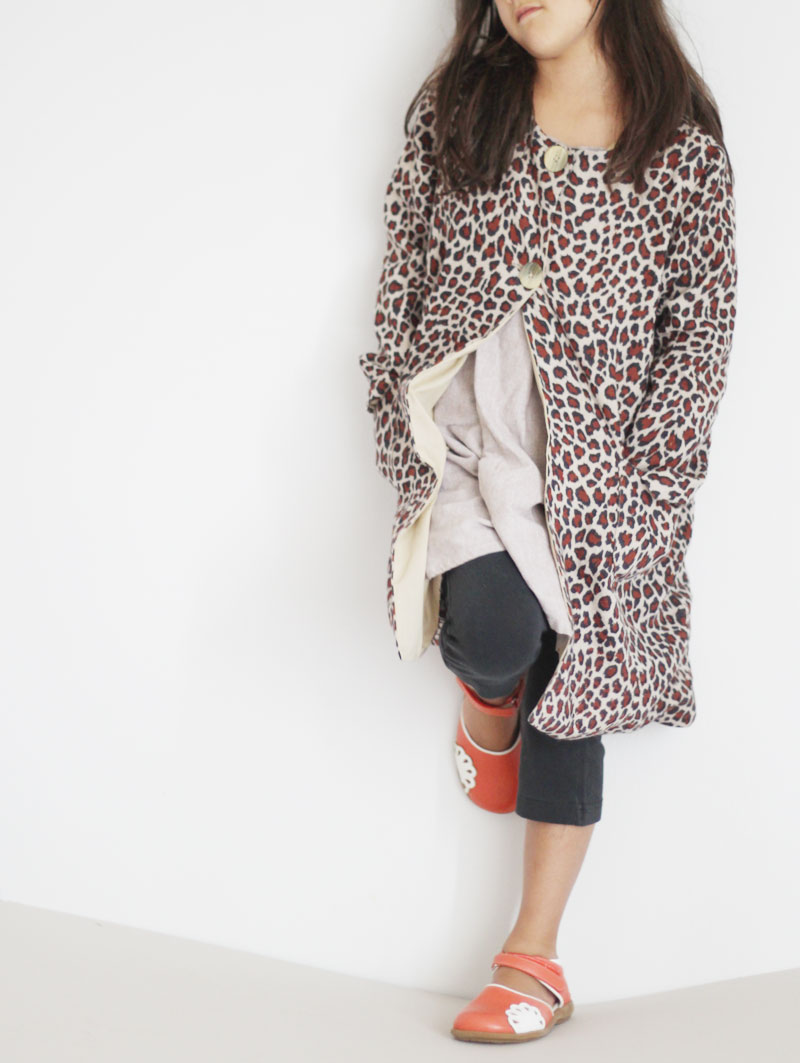
Happy Friday, friends! Today, I’m guest posting over at Compagnie M, so hop on over to see the details of this here creation which was inspired by the illustration on the left. The illustration is by Caitlin McGauley, who is insanely talented and one of my all-time favorite illustrators/designers. She painted the Emerson Fry leopard coat, which happens to also be a drool-worthy and favorite clothing designer of mine (though I have yet to own anything from their line), so you can imagine how much I love this. I contacted Caitlin last week to get permission to use her illo, and I was thrilled when she returned my email right away with the sweetest message, assenting to the usage. This creative community is amazing. Check out her portfolio for some serious eye candy, and her blog is always inspiring.

Some more outtakes of the photo shoot (notice the Flanae/Sanamingo pose in action above) – I made the tunic she’s wearing way back in November of last year and the black leggings are part of the few remaining store-bought items in K’s wardrobe:

********************************************************************************
Have a fantastic weekend, everyone! See you on Monday!

Birthdays are frequent
One down, another to go
Seven*! How time flies 

*K’s birthday is next week…my mind is reeling. How is it possible that seven years have passed?

Guest Post: Robin of Nested in Stitches

fave-things-banner

It’s Friday and I can’t believe that it’s the last guest post! They’ve been awesome, right? Last but clearly NOT least is Robin of Nested in Stitches. Robin holds a very very dear place in my heart. She’s one of the first people who started commenting on my blog that wasn’t my husband disguised as other people and soon we were emailing and I was beyond thrilled when she invited me to take part in the first ever clothing swap. It was a huge success and was such a challenge in the best possible way! Robin’s idea, of course. She’s good like that. Robin is immensely talented and technically savvy (must be the scientist in her — that’s Dr. Robin to you as she is brainy as all heck and has a PhD) and the garments she creates are so professional! Her cutie pie daughter C is the recipient of a lot of Robin’s sewing genius, but she sews for herself too and is a knitting guru and expert quilt maker to boot.

Above all, Robin is so kind and genuine and mega-nice. I feel very fortunate to have “met” her through blogland! Robin and I share a deep love of the Japanese aesthetic and simple, almost minimalistic clothing for kids. There are too many things I adore from her archives, but these are a few of my fave things she’s made:

[1] [2] [3]

I mean, really, how do you get any better than a Citronelle Dress+pink sneakers/a rendition of Bill Murray in Moonrise Kingdom/a Japanese apron? Take it away, Robin – she’s got some goodies!

*********************************************************************

happy friday, everyone! this has been such a fun series, thanks for having me, sanae!

some of my fave handmade things? let’s have a look.

1. appliqued linen ofelia dress. this might be my absolute fave handsewn garment. i just paper-pieced some 1″ hexagons up and arranged them in a fun pattern down the dress in place of the stripe. sadly, it’s too small for c now, but it got lots of wear- in part because i embraced the casual wrinkly linen look, so it never had to be ironed.

20120514-IMG_0813

3. the modern crosses quilt from modern log cabin quilting by susan beal. (blogged here.) this lives on our couch, and i love love love it. i really need to make some more quilts.

20121005-IMG_1464

3. the avery cowl knit up in uber soft malabrigo (more pics on my ravelry page) + wiksten tova top in an anna maria horner voile. ’nuff said.

20120227-20120227-IMG_0247_medium2

4. my cutting table. we made this two years ago and this thing is still solid and in fantastic shape. love. it. so. much. (details on how we made it here.)20120518-IMG_0817
*********************************************************************

Well folks, that’s a wrap of my first ever (kind of accidental) series! So sweet, so fun, so inspirational, no? I’ll have an outfit post for you on Monday — though I will technically still be in Michigan — and it features a pattern from one of my all-time fave bloggers. Until then, have a wonderful weekend, and a haiku:

Guest bloggers are gems
Thanks to them I’m so stress free
These guys are priceless

A HUGE thank you to all my fabulous guest bloggers!!!


Guest Post: Kristin of Skirt As Top

I have a sneaking suspicion that Kristin of Skirt As Top is superhuman from a far flung and little-known planet where overachievers are secretly bred with sewing powers. At the very least she had to have been class president or something similar. Kristin exudes charisma and has an acumen for coming up with brilliant collaborations. She is a driving force behind Film Petit (Napoleon Dynamite is the most recent feature. Hilarious!) and Vintage May, two of the coolest sewing series around. On top of her supreme prowess in all things sewing-related, she’s whip smart and is the friendliest gal, quick to show warm and encouraging support for newbie and veteran bloggers. Oh, she also has terrific decor chops.

Kristin creates fun and hip outfits for her littles Em and O, and I think she guest blogs more than any blogger I know. I love that she’s venturing into sewing for herself and pattern-drafting (I’ve already made two of her scoop tops and need to make more). I thought all her Project Run & Play entries were incredible (especially this one), and these are a few of my fave things from Kristin’s abundant archives:

[1] [2] [3]

The Pollock-inspired tunic, fruit skirts and Back to the Future interpretations make me immeasurably happy. Here’s Kristin, to talk about her faves…

*********************************************************************

Hello!  While Sanae is off enjoying some sunshine, I’m here sharing a few of my favorite handmade things with you.  And honestly, this was a super hard topic!  I like different things for different reasons, and my favorites tend to change on a regular basis.  So I decided to try to pick my daughter’s favorite thing I’ve made, my son’s favorite, and my favorite.  My husband’s favorite is as-yet unblogged!  It’s actually his Father’s Day gift, and I haven’t gotten a chance to get photos of it yet because he’s using it too much.

Anyway, here we go!

MY DAUGHTER’S FAVORITE: “Purple Wedding Dress”

wedding dress

I made this little dress for her as my “signature look” Project Run & Play Season 3 in Winter 2012 (I was a contestant).  It’s self-designed, with a maxi-circle skirt which I dip-dyed purple for an ombre effect.  The fabric is an old (super soft) bedsheet. I made it “just for fun” because I had been voted out of the competition the week prior, but wanted to finish all 6 looks without spending amy more money on fabric.

wedding dress

My daughter didn’t wear it very much back when I made it, but last summer she suddenly decided she wanted to wear her “wedding dress” constantly, and she’s been wearing it ever since – out in public, for dress up, to bed, to climb trees.  When one of those tree climbing incidents resulted in her ripping the skirt, she hounded me relentlessly until I fixed it.  The purple is now faded and it’s about 3 or 4 inches shorter on her, but it’s still her most favorite.

MY SON’S FAVORITE:  “Hockey Shirt”

film petit: ferris bueller's day off

I made this little outfit as a part of an ongoing series my friend Jessica and I host together, called film petit, where we sew mini-versions of our favorite movies.  A few months back, we chose Ferris Bueller’s Day Off and I sewed the look of Ferris’ best friend, Cameron – my post is here.  Part of Cameron’s look is a Detroit Red Wings jersey.  The pattern is the Vintage V-neck by Blank Slate, and I pieced in contrast white stripes.  The logo is a hand-cut freezer paper stencil.

film petit: ferris bueller's day off

The little guy wants to wear his “hockey shirt” all the time – almost as often as his store-bought “basketball shorts.”  We don’t even watch hockey as a family so I really didn’t think he’d care about it one way or another, you know?  He’s two!  But he does, and it’s cute.  🙂

MY FAVORITE: “Washi Two”

dear stella washi dress

Though I think recently-completed Washi Three might actually be my favorite self-sewn garment to date aesthetically, Washi Two (shown above) holds a special place in my heart because it’s my first sewn-for-me garment that I choose to wear ALL the time and never feel like I’m walking around in something “homemade” looking.  It just makes me happy when I wear it.

washi dress scoop neckline

It’s comfortable, flattering, casual but still able to be dressed up for a date.  It’s the first self-sewn garment where I bought fabric for it that wasn’t sale bin/cheap stuff, because I knew that Rae’s Washi Dress Pattern would work well on me.  It gave me confidence and caused me to love sewing for myself – I now see it as a fun new adventure.

I hope you’ll come visit me at skirt as top sometime!  Thanks so much for having me, Sanae!