Remember the peachy top with zippered pockets? I heard the clamor for a tutorial (do two people count as a clamor?), and I am a woman that delivers. This, my friends, is my first sewing tutorial and I’m going to throw the disclaimer out there that it’s a bit rough. First of all, I had some challenges editing down photos so warning: endless photos coming up. At the same time, I seem to have missed taking photos of some key sections, but c’est la vie.
Anyway, if you’re feeling the need to add angled zipper pockets to a knit top, the following are the steps I took. The process is pretty similar to the welt zipper pocket tutorial that Delia posted this week, and her photos and instructions are excellent, per usual.
If you want to skip the tutorial, keep on scrolling (and scrolling and scrolling…) and you’ll see some cute pictures of K modeling the top towards the bottom. The last one is particularly sweet, I think.
So here we go:
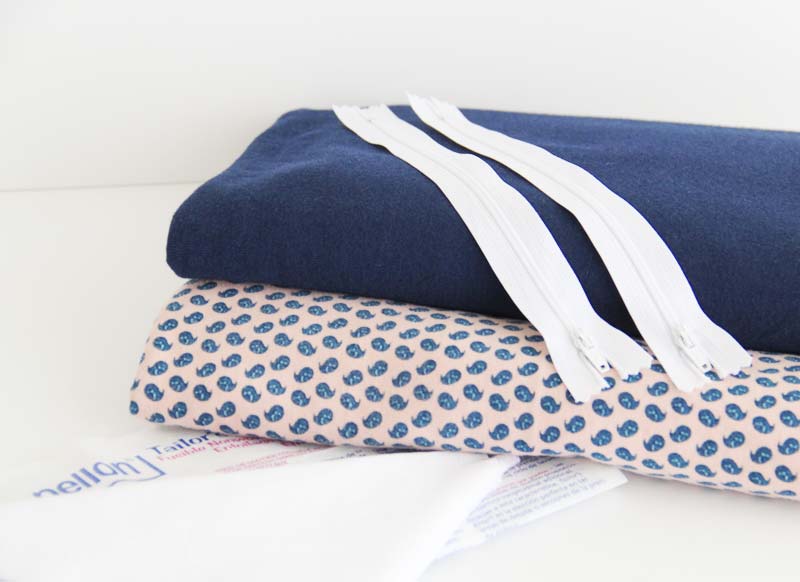
Here’s what you’ll need (not everything listed is shown in the image):
Knit top pattern
Tracing Paper
Fabric for top and pocket lining – I used a jersey knit for both
2 zippers – 7-inch should do you good
Interfacing
Wonder Tape (this is for holding the zipper in place. You can use pins if you prefer)
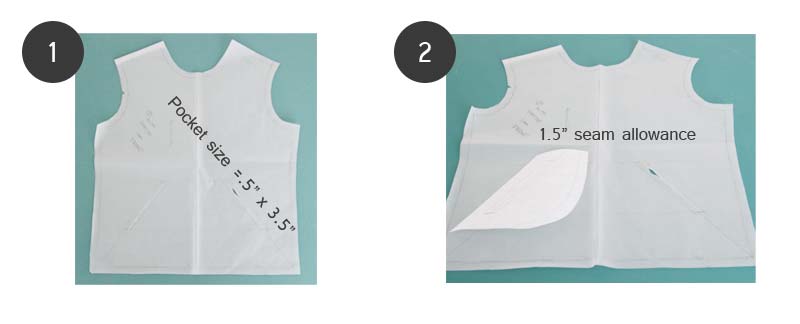
1. Add pockets to the front bodice of your pattern. Math is not my strong suit and I basically eyeballed where I wanted the pocket to be, used a ruler to straighten things out, and then mirrored the pocket on the other side. I decided to make my pocket opening 1/2 inch x 3 1/2 inches to show a bit more of the zipper at the opening. I drew the rectangle on the pattern piece and cut out a slit in the middle of the rectangle.
2. Place tracing paper (this is my fave) on top of pattern to create your pocket piece. I added a 1.5 inch seam allowance around pocket opening, then drew the curved portion freehand to make it look like a pocket. Note: my pockets look really small, but because it’s knit, it totally stretches and worked well.
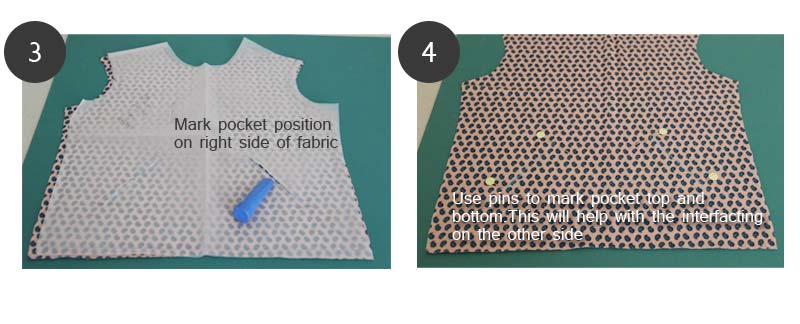
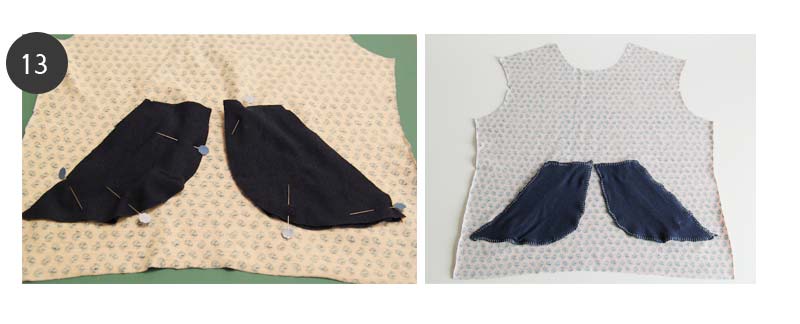
3. Cut out pattern pieces from fabric and trace pocket positions onto RIGHT SIDE of front bodice. Remember, you’ll need FOUR pocket pieces total. Also cut out four strips of interfacing. Since my pocket opening is 1/2 inch by 3 1/2 inches, I added a 1-inch seam allowance all around for the interfacing, so I ended up with FOUR interfacing pieces that measured 2 1/2 inches by 5 1/2 inches.
4. Use pins to mark where the pocket opening tops and bottoms are. Now that I’m looking at it, you could also just trace the pocket positions on the wrong side and iron on the interfacing using the chalk marks instead of the pin positions.
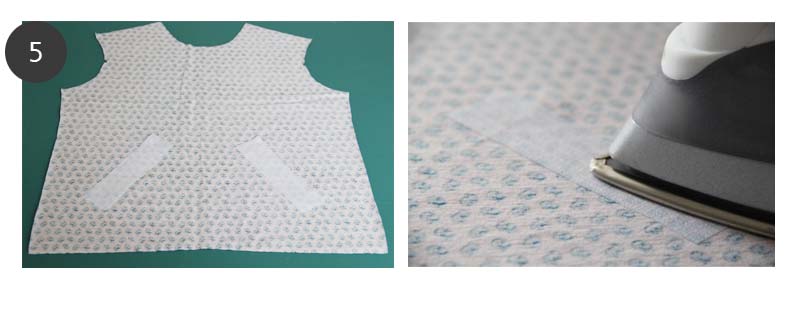
5. Iron on the interfacing onto the wrong side of the fabric. This is to stabilize the knit for the zipper.
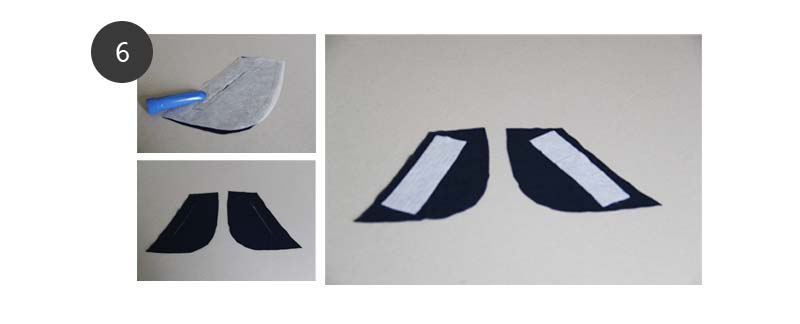
6. Now you’ll do pretty much the same thing for the pockets. On the wrong side of left and right pockets, indicate pocket position and iron on interfacing. Also, draw a 1/2 x 3 1/2 inch rectangle (or however large you decide to make your pocket opening) onto the interfacing for both left and right pockets.
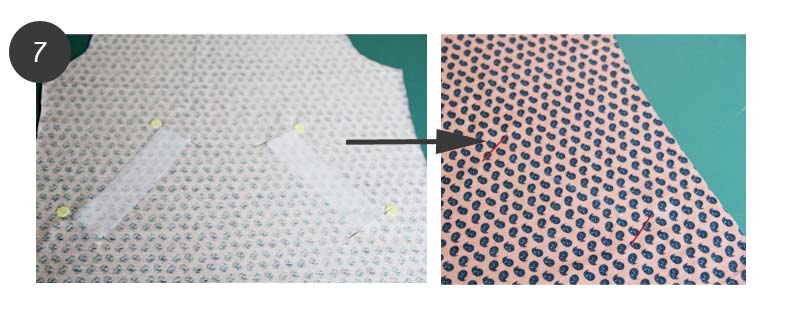
7. Take out your (potentially unnecessary) pins from the right side, and mark the interfacing positions on the wrong side this time. I highlighted how the pins will show through in red on the right side. This will guide you for the pocket placement.
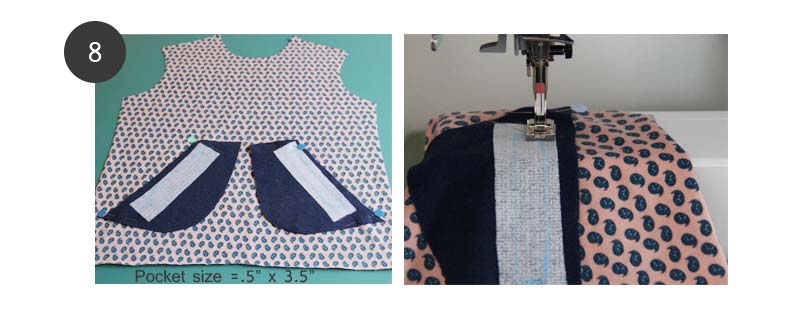
8. Using a Braille-like method and feeling for the pins, align the interfacing portion of the pockets with interfacing side facing up. I didn’t get it exactly, but was pretty darn close. Once you’ve gotten the pockets positioned well, remove the pins from the wrong side, and pin pockets to bodice. Sew along the rectangle you drew. I tried both a stretch stitch and a regular straight stitch and both worked fine.
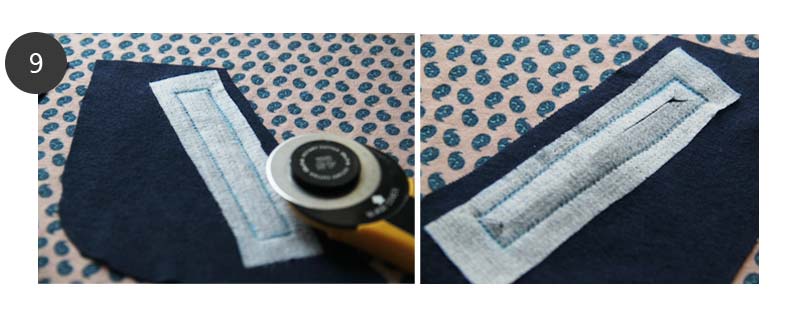
9. With a rotary cutter or scissors, cut a straight line through the middle of the pocket opening through all layers of fabric. Leave about 1/2 inch of space on both ends. Then using sharp scissors, cut diagonally into the corners as close to the seam as possible.
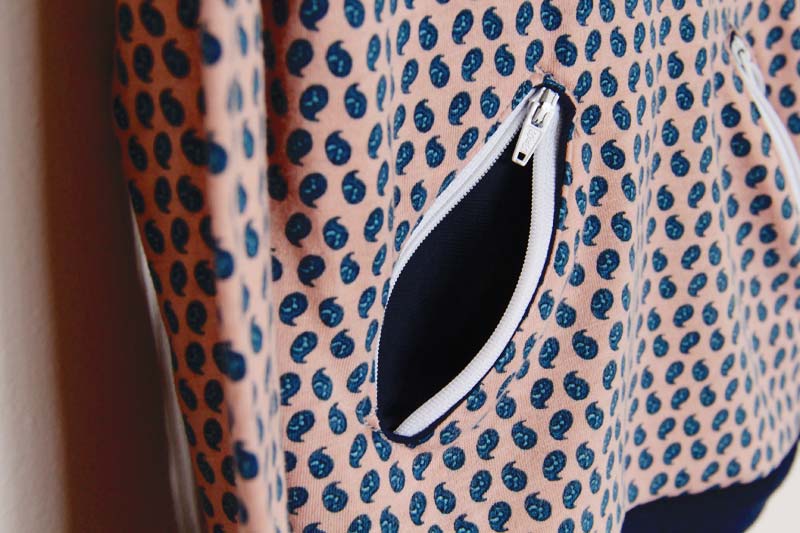
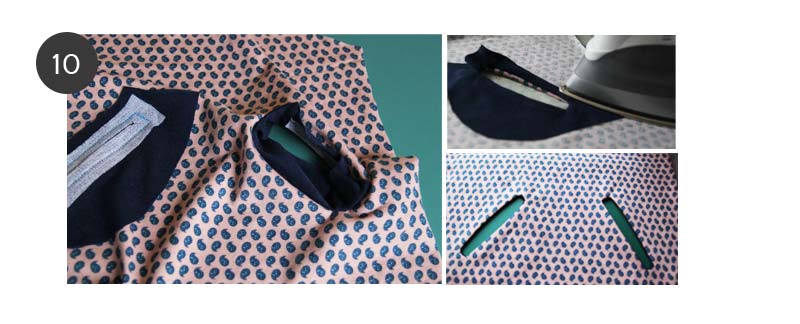
10. Pull the pocket through the opening and iron the opening flat. As you can see above, you should have a neatly finished pocket opening.
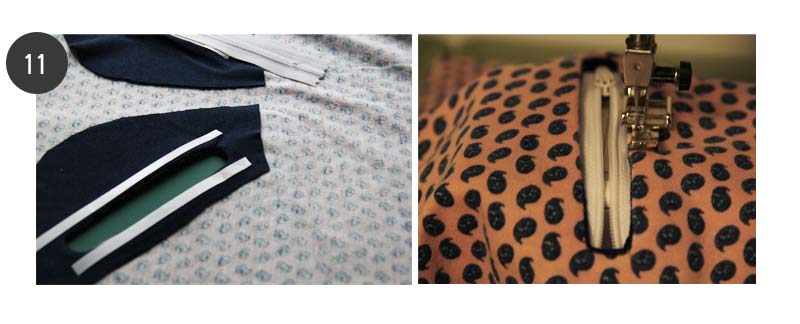
11. I used the Wonder Tape to hold the zipper in place, but it was quite wide and the tape made the pocket stick together in weird ways, so next time I might just try pinning. Sew close to the edge of the pocket opening. I used a zipper foot here, but because I made my opening quite big, it wasn’t strictly necessary.
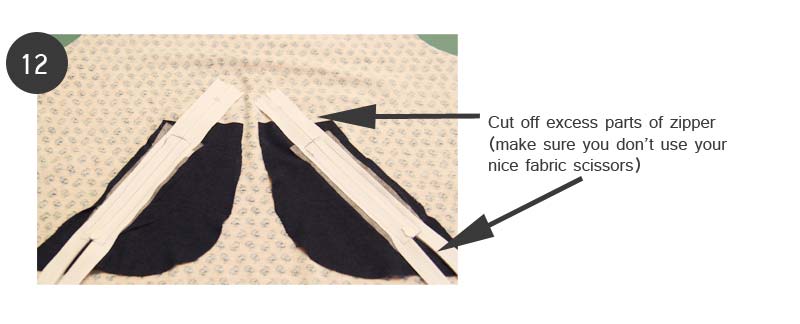
12. Cut off excess parts of zipper. Not quite sure why I felt the need to write out the instructions in the image for this particular step. But you can see here how the Wonder Tape is peeking out around the zipper. There’s a thinner Japanese double-sided tape that works a little better, but I was all out.
13. Pin the pocket linings together and sew all around. Keep in mind that you’re sewing only the pocket pieces together and not onto the bodice. The pockets are already attached to the bodice at the zipper opening. I used my mock serger finish on my machine so it looks a little puckered.
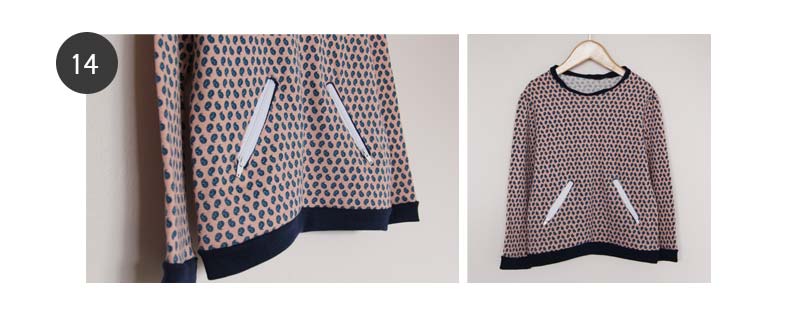
14. And there you have it! The pockets do flop around a bit inside, so you could also sew the curved portion onto the bodice and that could look like a cool design element. I happen to like the way it looks like the pockets are floating, and the floppiness didn’t seem to bother K any. Then again, she wore a t-shirt underneath so maybe that’s why.
If you give it a try and come across any errors are have any questions, please let me know. I’m excited to develop my tutorial skills, and I assure you that they will get better!
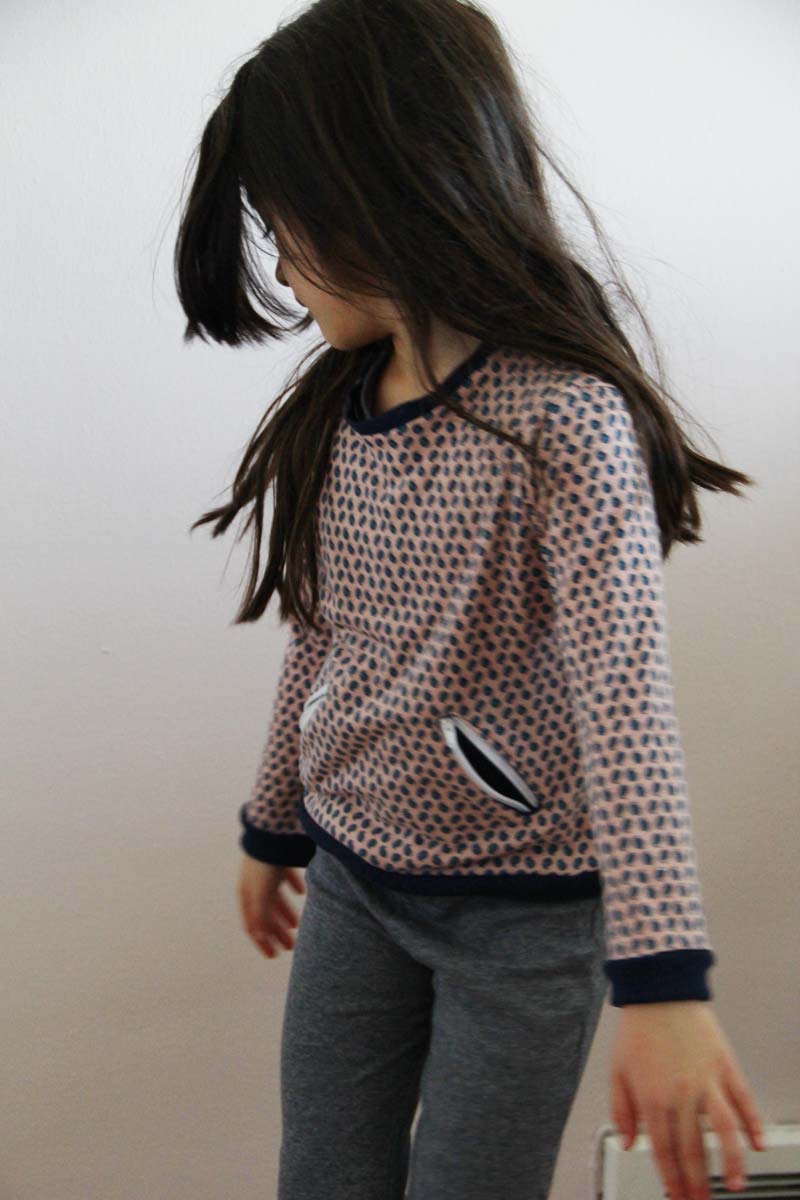
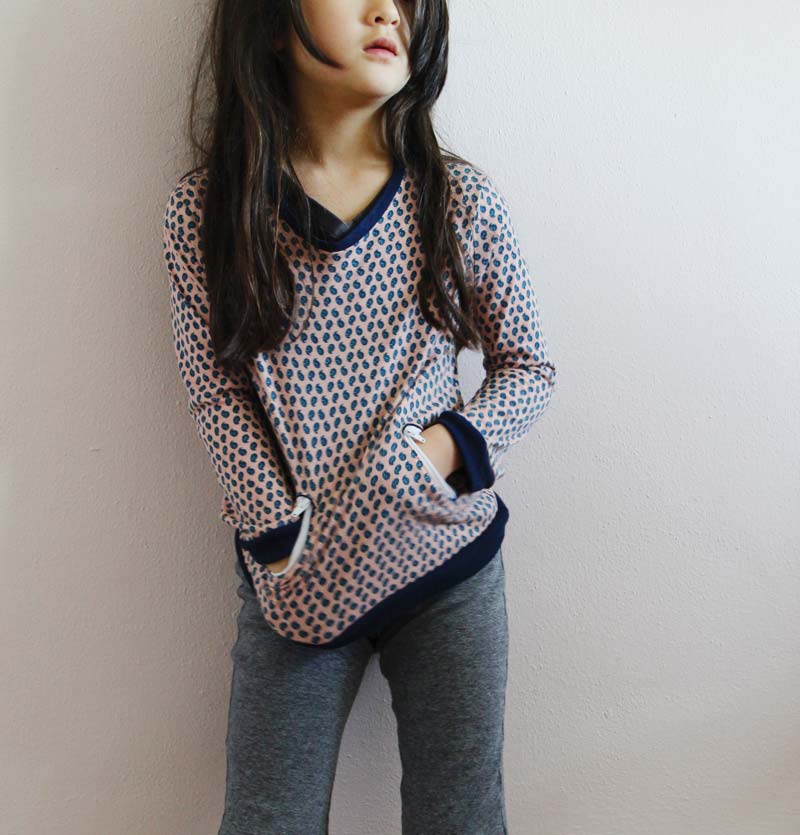
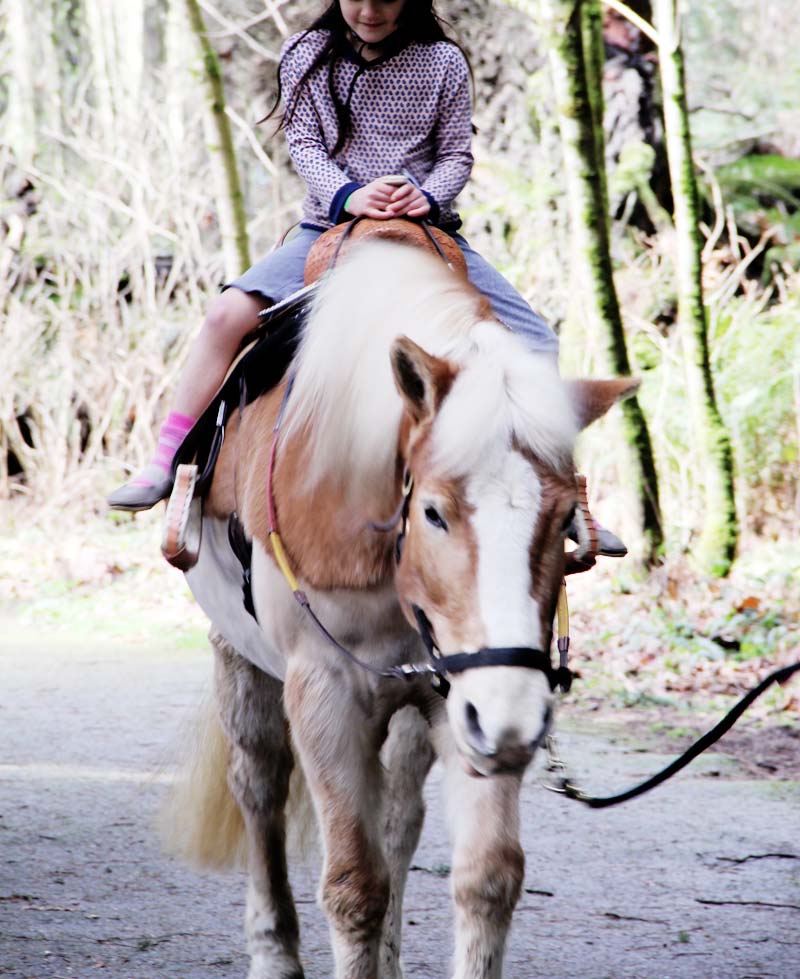
Here’s the top in action:

Great tutorial, Sanae… very thorough! I have NEVER sewn with zippers. *SHOCKER* I’ve been scared to try it, but after seeing your tutorial and how fab it looks on K’s shirt, I just might muster enough courage to do it. 🙂
I’m still not very good at sewing with zippers – there’s just something inherently intimidating about them, isn’t there? But I hope you get to try it, Venus 🙂 zippered clothing is extra fun, I think.
She’s on a horse! Thanks for the tutorial, Sanae! Fun fun detail, want to try it on some boy clothes.
My little one is pocket crazy, he’s going to love this! Thank you so much for the tutorial!
Hi Carla! Pockets are the best!! And when you add zippers, it not only helps contain the contents better, but it’s also extra fun for the kiddies to open and close 🙂
Congrats on your first sewing tutorial, Sanae! Zippers have been the bane of my sewing existence, avoided at all (well, most) cost. Perhaps I will become brave enough to try again, and with your tutorial as a guide, even be successful!
Loved the pictures of K – esp. her excited yet slightly nervous smile while on the horse:) And great tutorial pics too!
I feel the same way about sewing zippers but I love the look of them so much, I’m slowly trying to incorporate them more and more into my sewing. If I get to the point where I feel like I’ve mastered zippers, I’ll do a tutorial! 🙂
Thanks so much, Sanae. And that was a great job on the tutorial. (Especially for the first time!) I absolutley LOVE your sense of style….so evident in what you create for your little girl. Keep going! So beautiful.
Thanks so much, Shelly! I think I could really get into this tutorial-making thing and can’t wait to do more!
Lovely. I would love to have zipper pockets on some knit shirts I own. Useful and cute!
Yaay for you! This is a great tutorial, thank you very much. I have a 2 year old who is OBSESSED with pockets at the moment – very necessary for treasure stashing, apparently. Most of her clothes don’t have pockets, so I’m off to buy some zips pronto! Thanks again x
Great tutorial Thanks
Glad you like it! Thanks, Nancy!