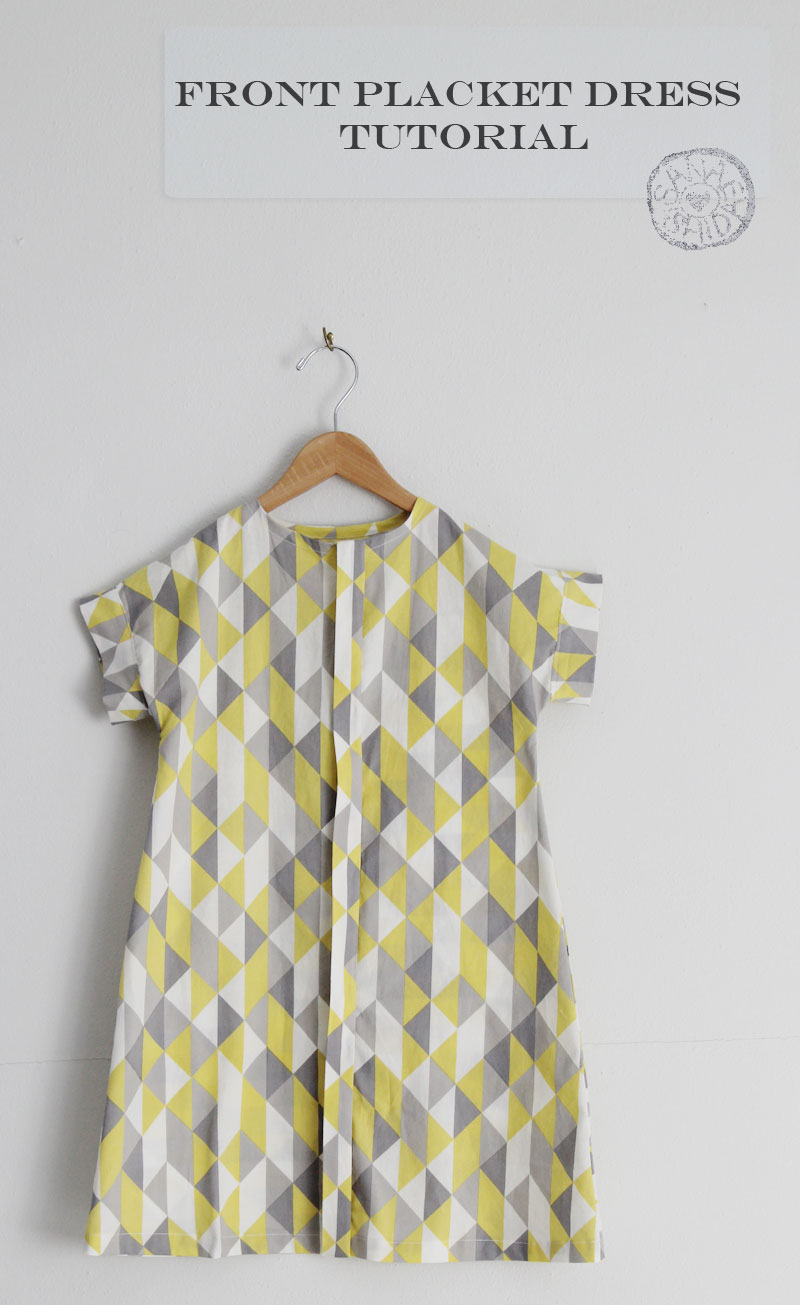
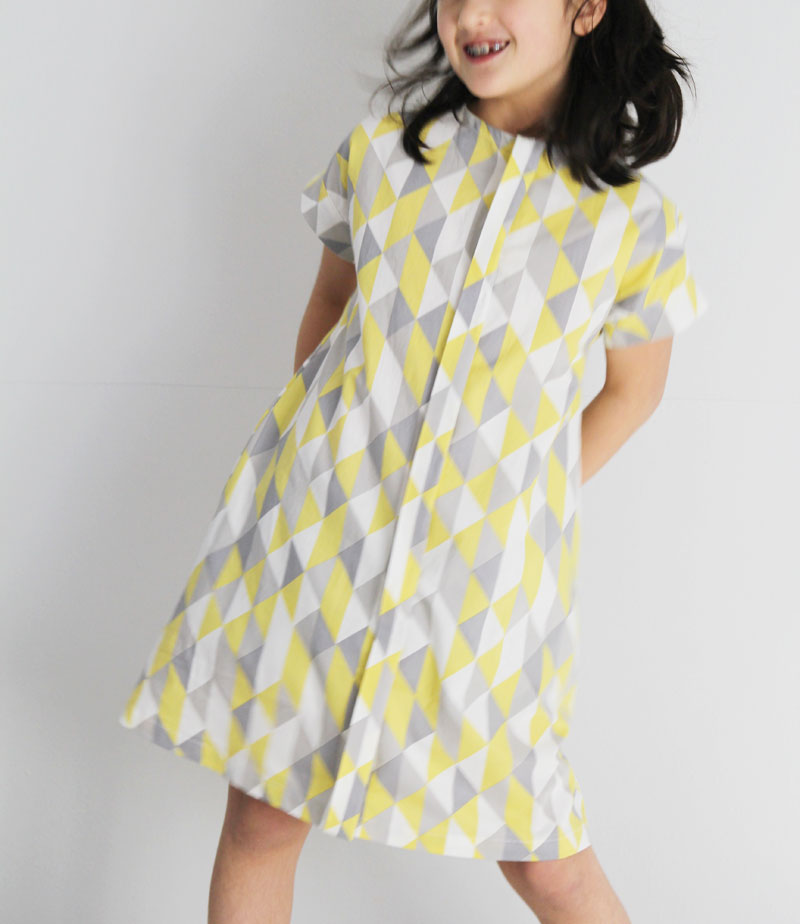
Well, here it is (this one’s for you, Lucinda): the tutorial I meant to post on Monday from this awesome, awesome book that has rapidly become my favorite. This tutorial is very long and is purely a reference post, but it could also be an interesting way to see the Japanese text translated. I just hope it’s helpful in some way.
I approached this in a way that seemed most practical to me, but let me know if you have recommendations and suggestions for improvements. I want to do more of these since I get so many questions about whether certain books are available in English, and though translating entire books wouldn’t be feasible (nor legal, I imagine), my aim is to provide tutorials for unique designs or specifically requested items when possible. I broke up each step and directly translated the instructions, but I also did my own sewalong and will show you how I actually sewed the dress. What’s interesting is that I translated the instructions after I made the dress and I realized I missed a bunch of steps!
So let’s try this, shall we?
For this pattern, the instruction pages look like this (I added the pink circled letters though):
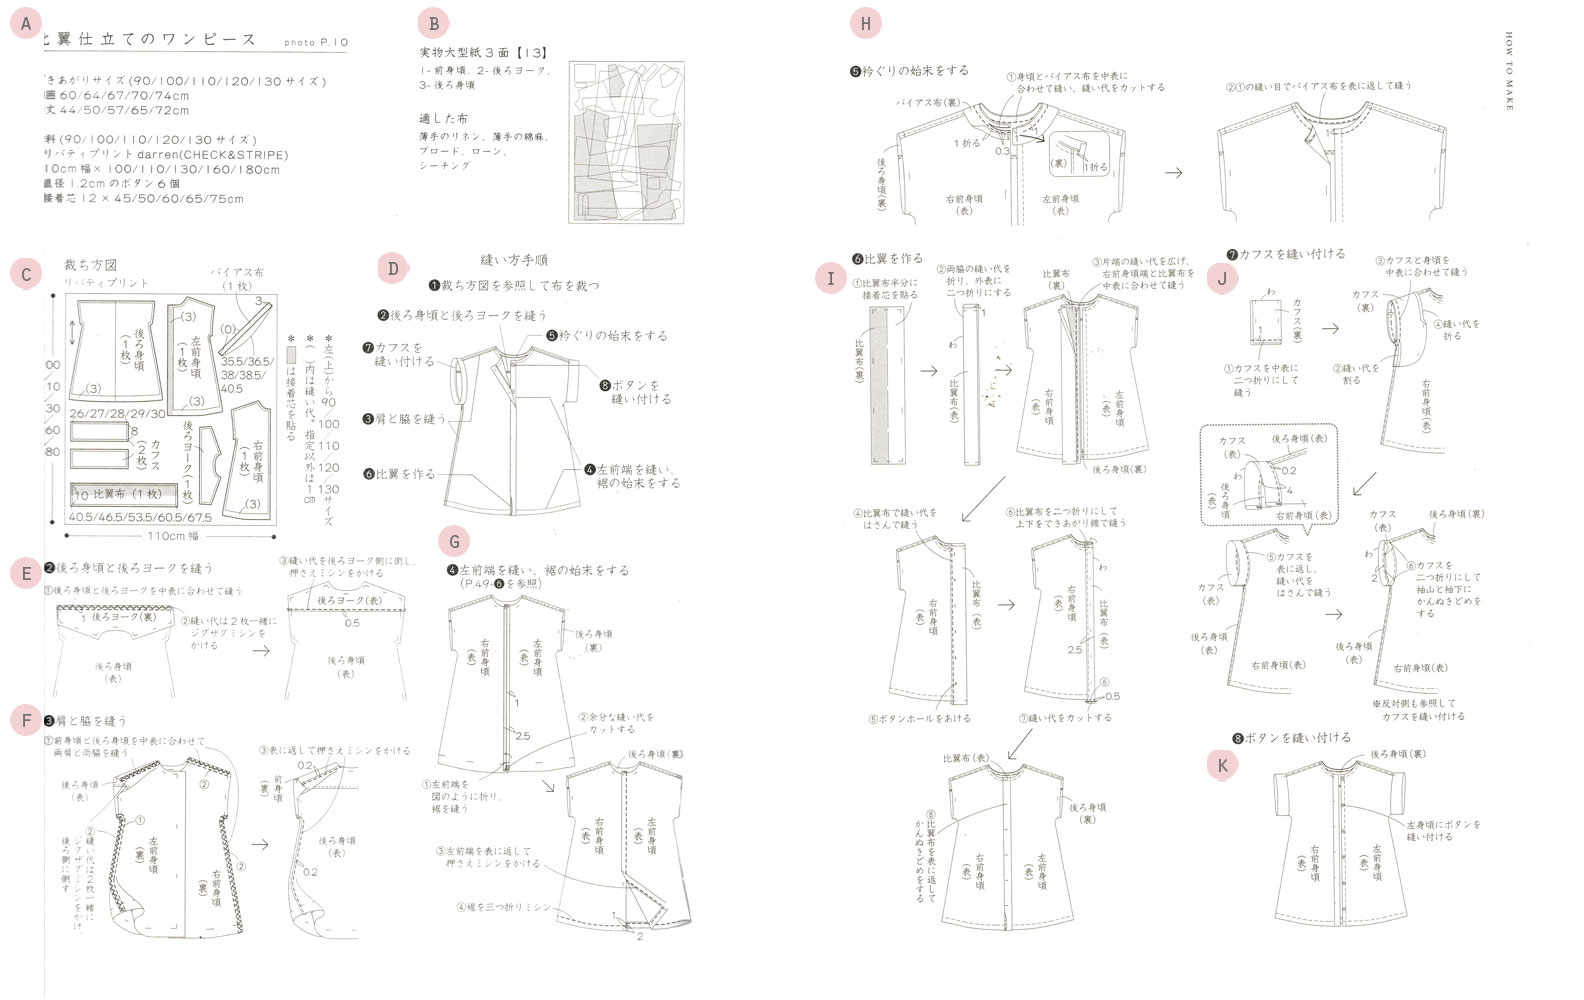 I’ll go over each letter individually. I’m warning you, it keeps going on and on…
A – SIZING + MATERIALS/SUPPLIES
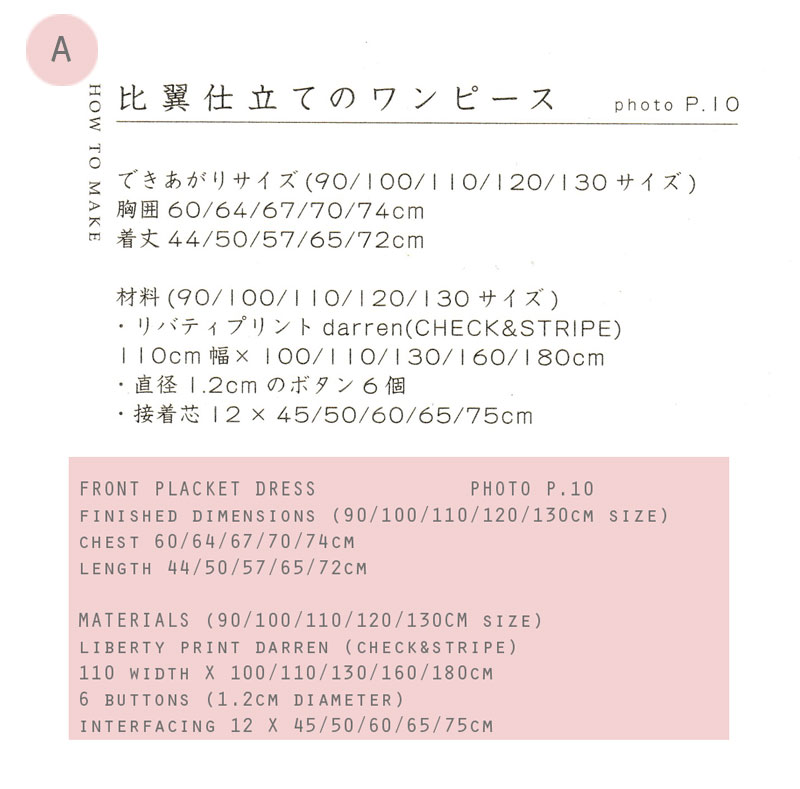
This first section just details sizing information and supplies needed. Notice that Japanese sewing books actually list the specific fabric used.
B – PATTERN PIECES REFERENCE
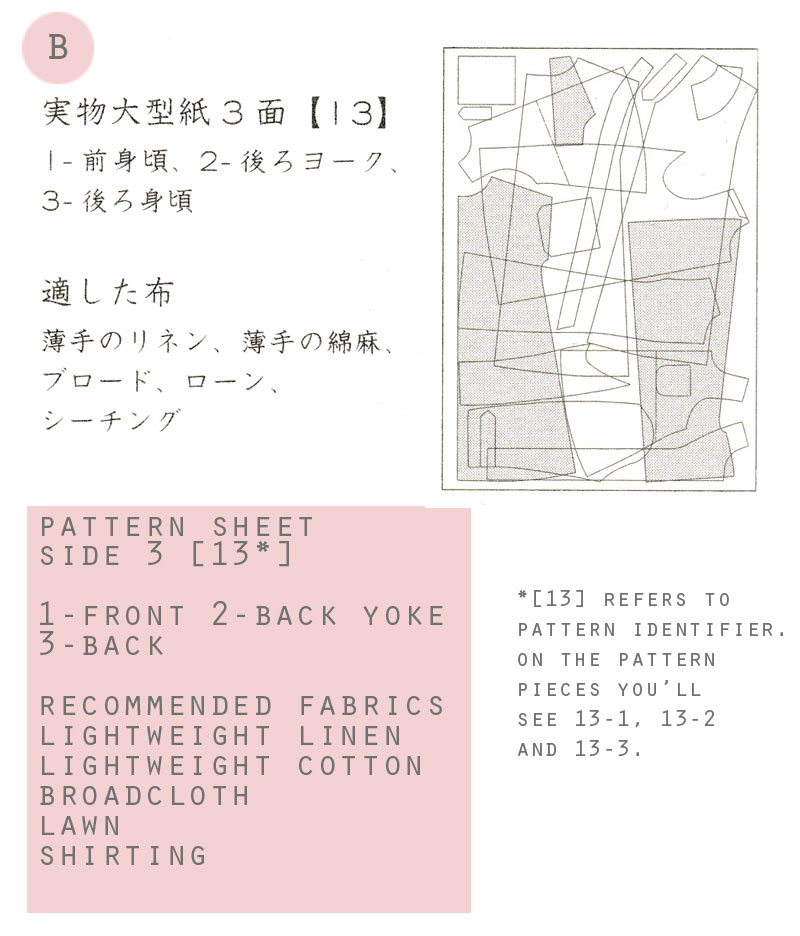
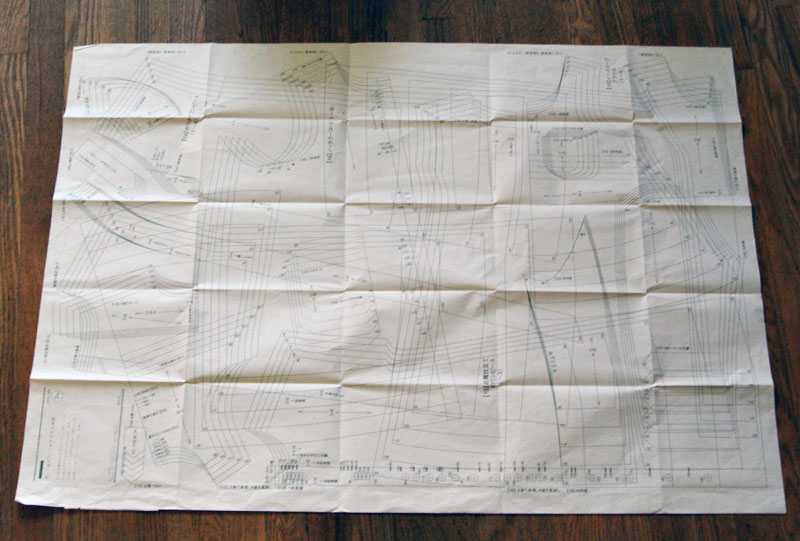
Next, this particular book provides where you can find the pattern pieces on the confusing mass. This is unusual, and I haven’t seen this in my other Japanese books and is very helpful! If you’ve never seen a Japanese pattern sheet below, it’s crazytown:
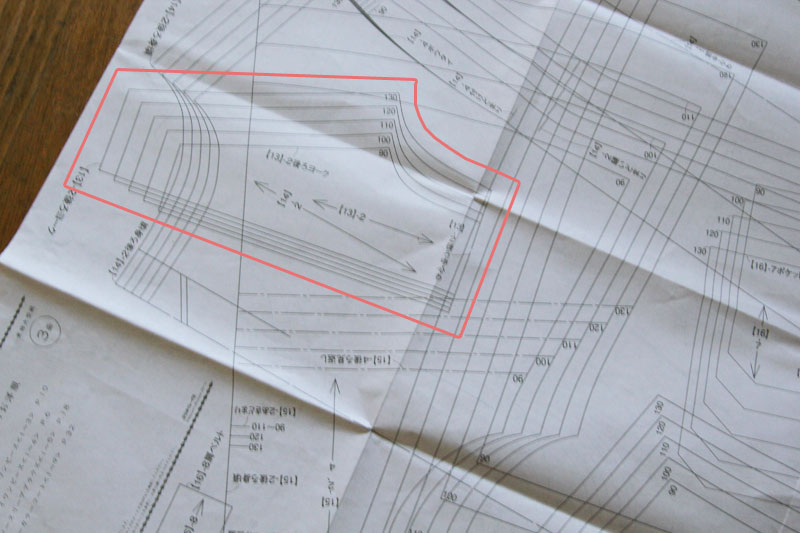
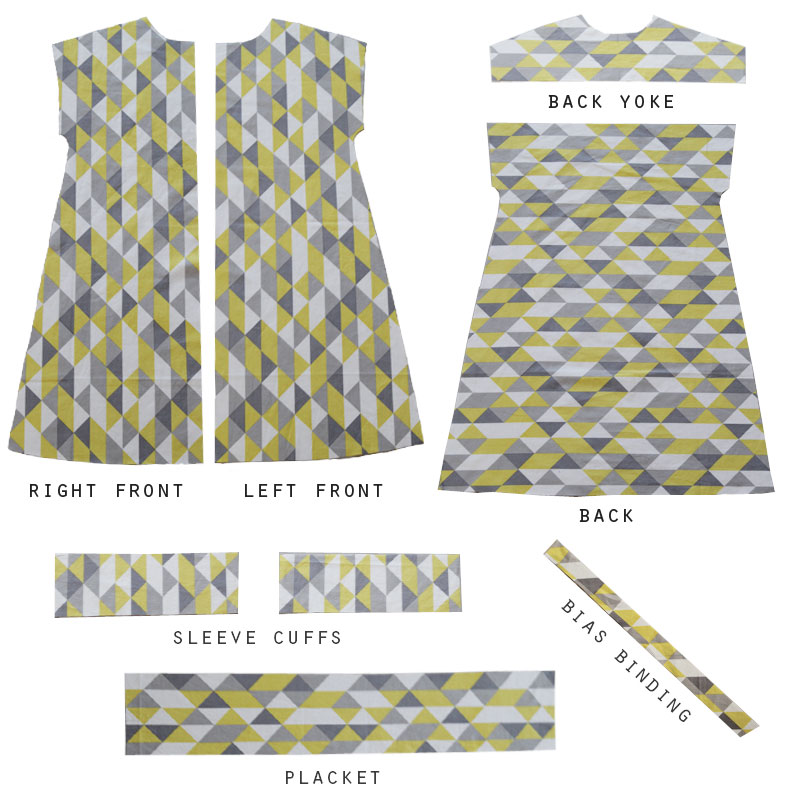
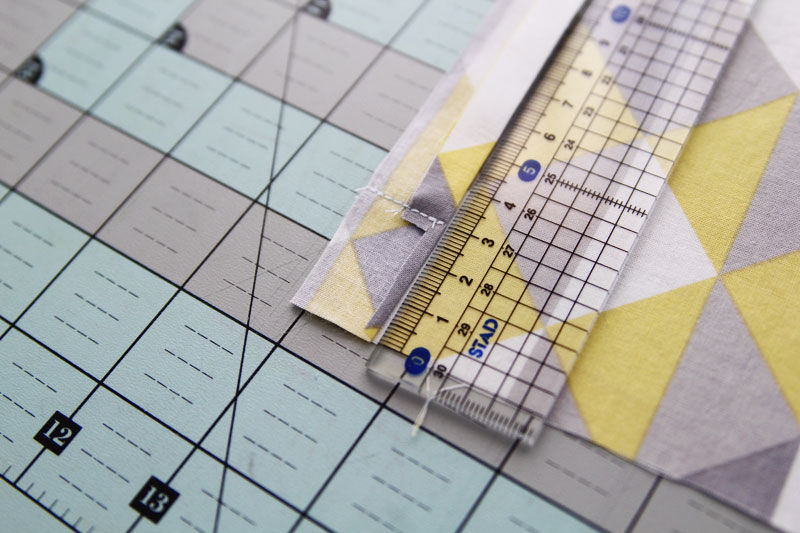
Here’s a closer look at pattern 13-3, the back yoke. You’ll be tracing the size you need and then adding seam allowances to all the pieces. For this dress, there are three pattern pieces to trace and you draft the sleeve cuffs, the placket and the bias binding using a ruler and the dimensions provided.
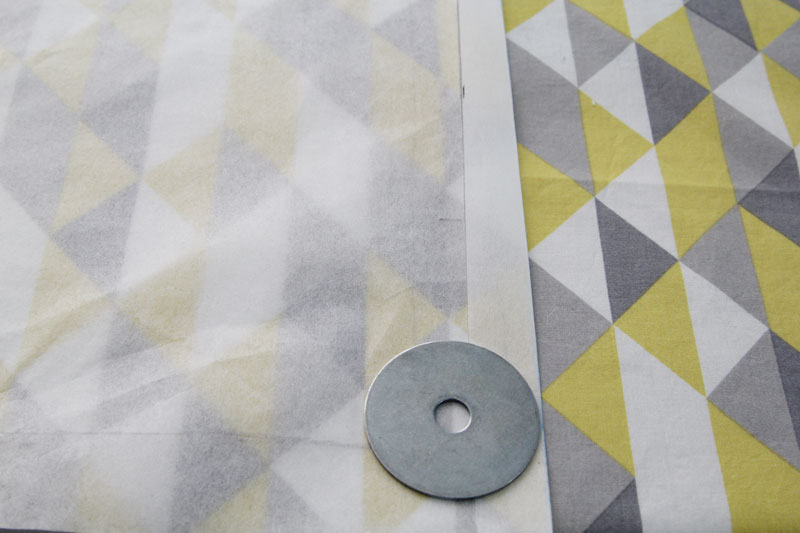
One of the things that might be confusing with this particular pattern is that you need to add a 1cm seam allowance (SA) to the right front piece and a 3cm SA for the left front piece. I ended up creating just one pattern piece for the front piece, added 3cm, then drew a line for the 1cm SA. I simply folded the pattern piece to the 1cm line to trace the right front. Like so:

Onto the cutting of fabric!
C – CUTTING LAYOUT
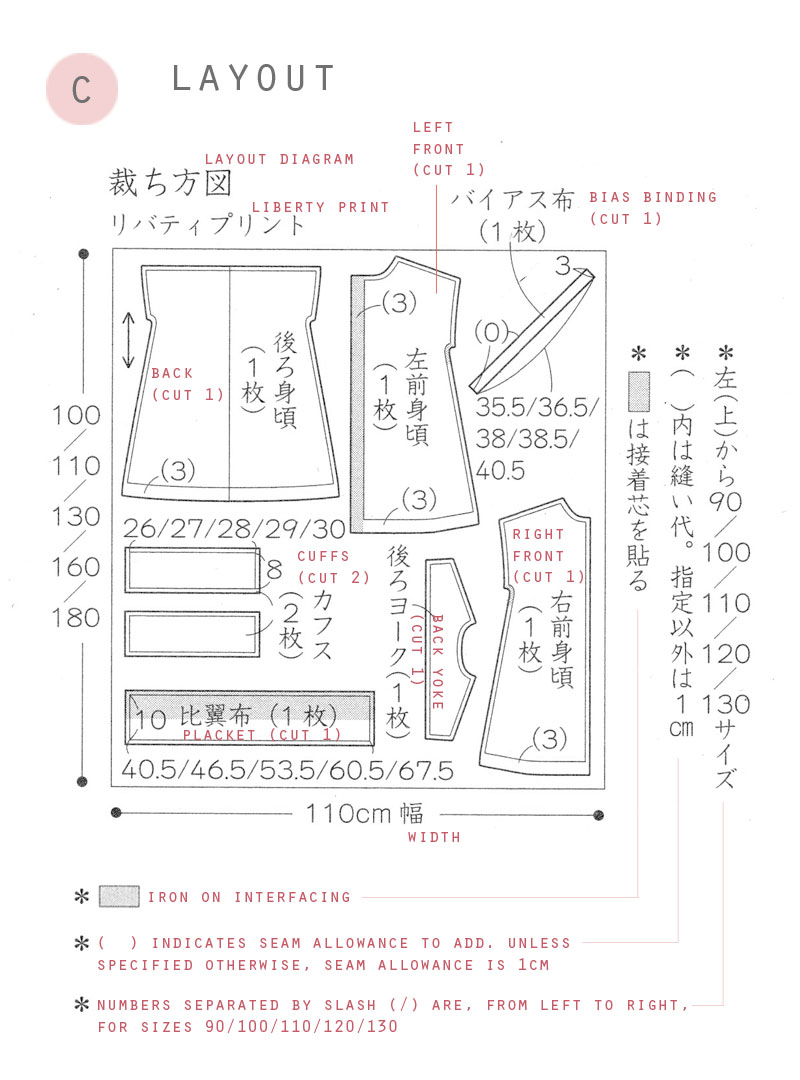 Above is the suggested layout for cutting out the pattern pieces, but I only had 1.5 yards of this geometric cotton so I had to cut the back piece cross grain and squeezed out the bias binding. This diagram is also where you would find how much seam allowance to add to the pattern pieces you’ve traced.
It all worked out.
D – CONSTRUCTION ORDER
Every Japanese sewing book has one of these overview diagrams of the construction steps, and most of the time, this is the only diagram that I consult these days, unless there is a particularly tricky bit like the placket.

E – ATTACH BACK YOKE TO BACK PIECE
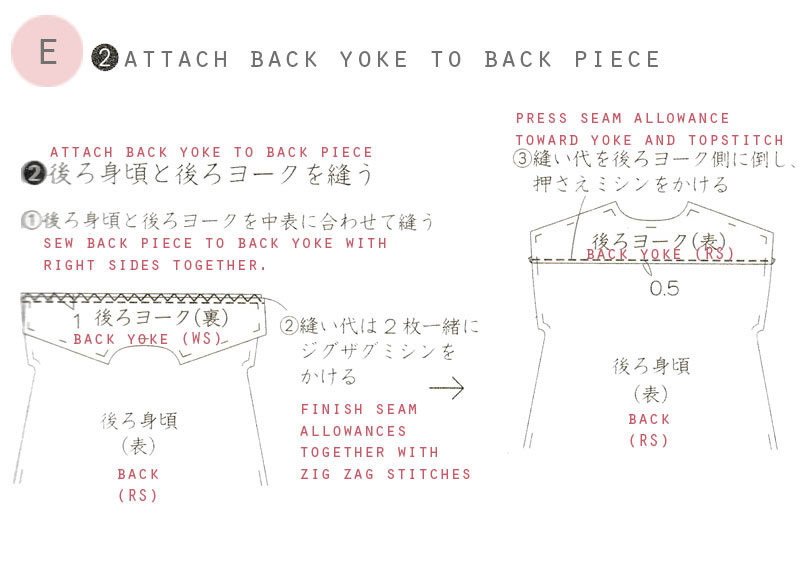
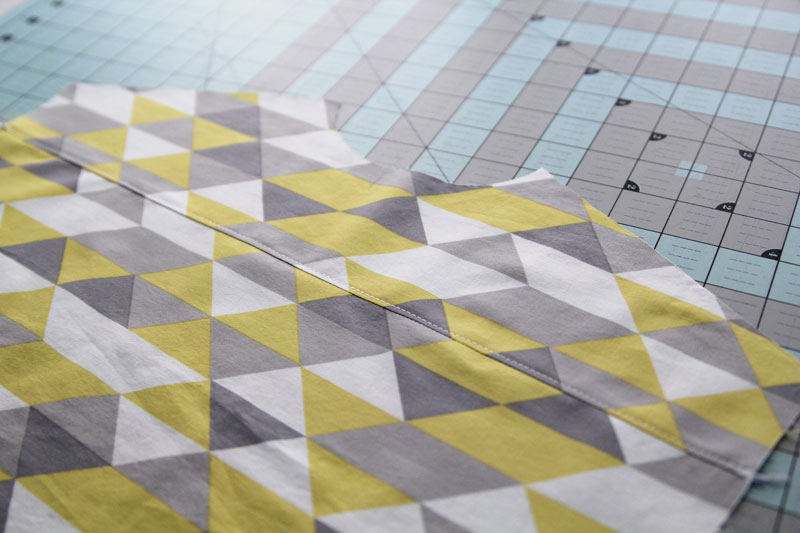
This is pretty self-explanatory. I was good about following the instructions and pressing the seam allowance toward the yoke and topstitching.
F – SEW SHOULDERS AND SIDES
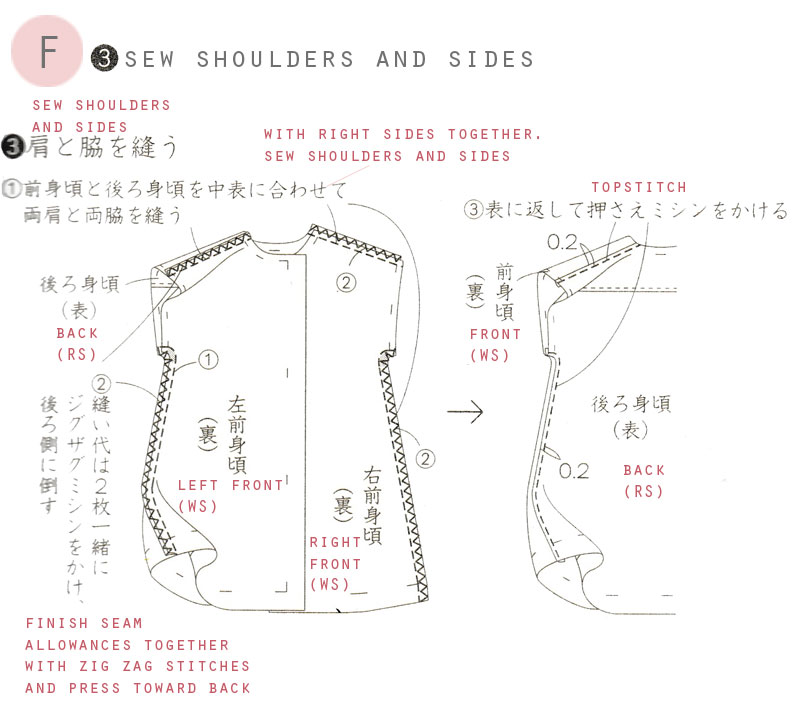
For this step, I didn’t bother topstitching the shoulders and side seams. I actually didn’t like how it looked on the first dress I made so I skipped it for this version. Tip: I like to clip into the curves of the side seams so they don’t pucker as much.
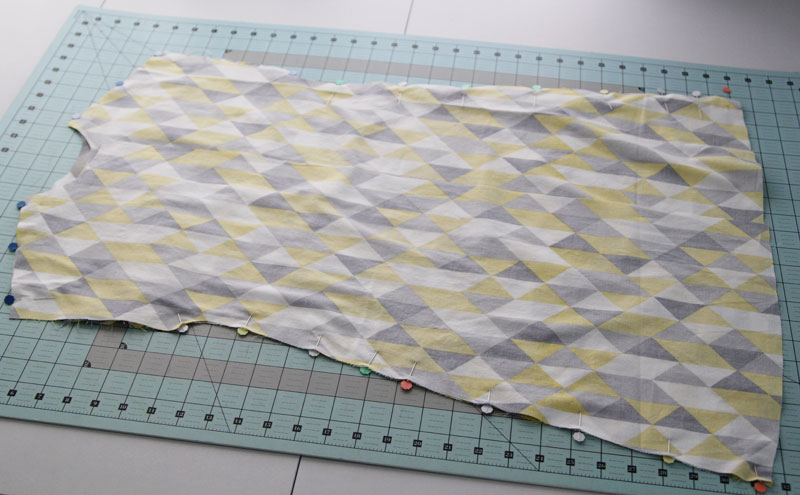
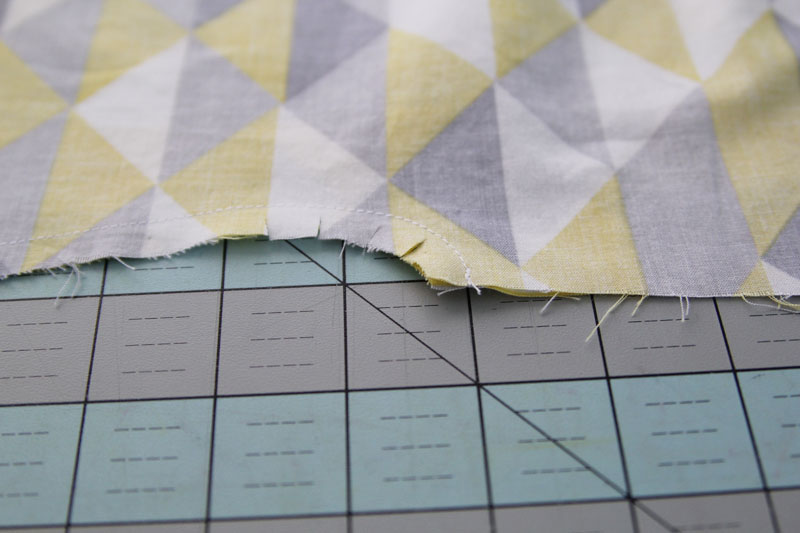
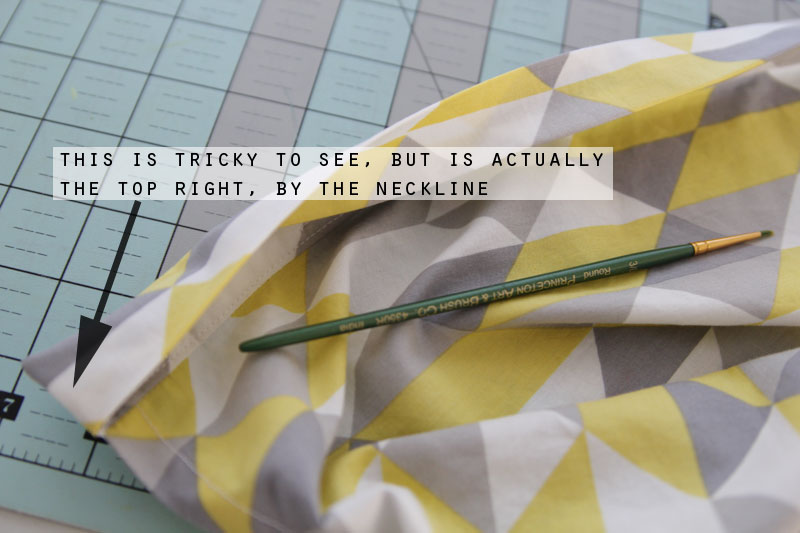
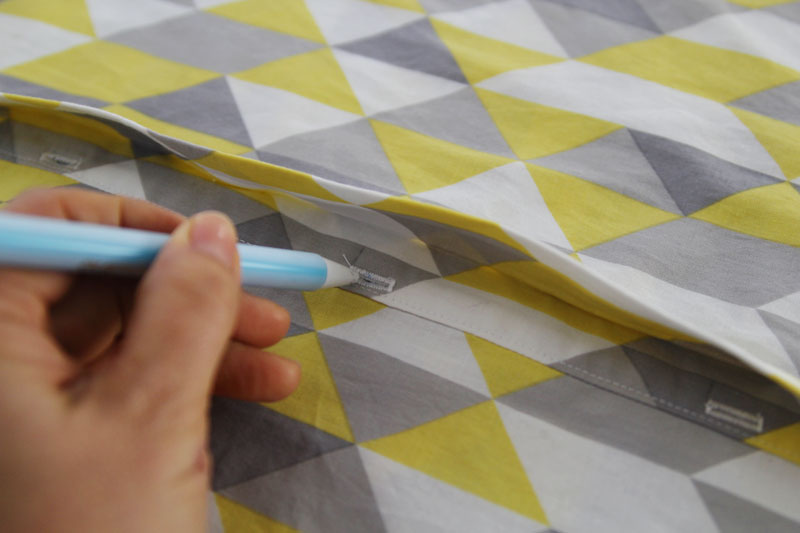
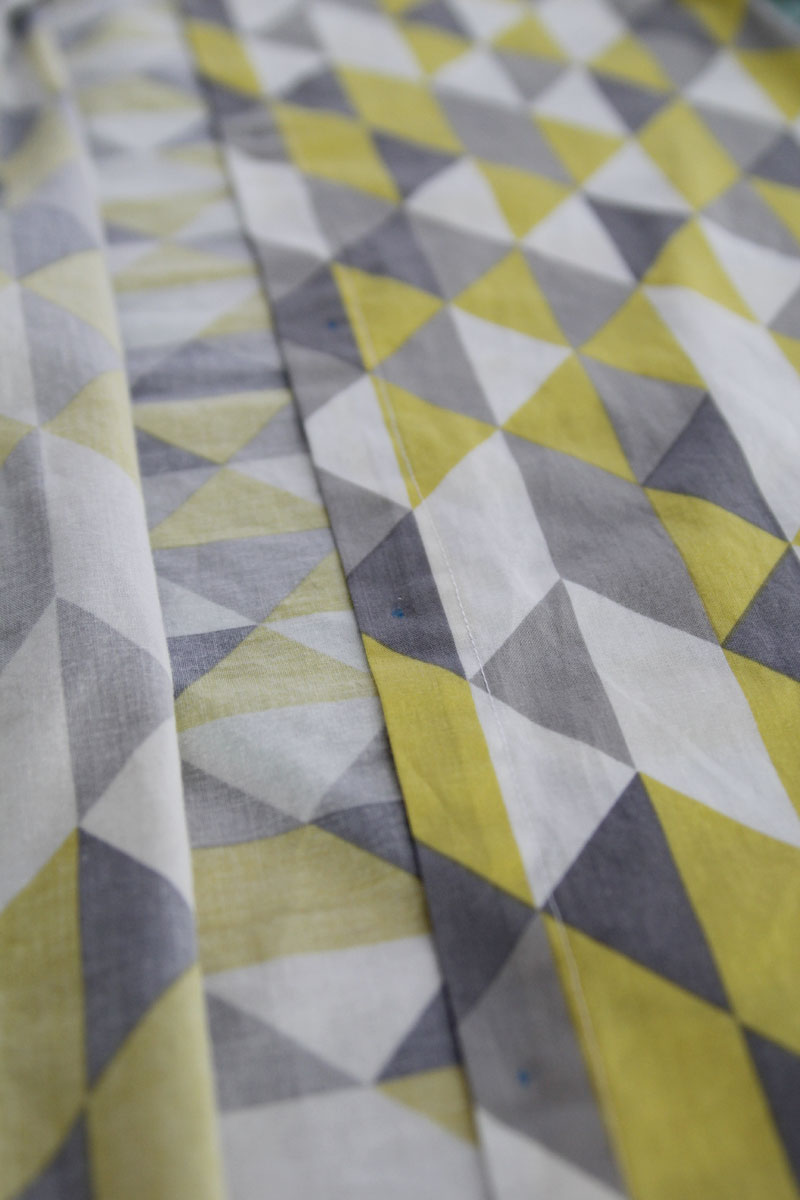
G – SEW LEFT FRONT OPENING AND FINISH HEM
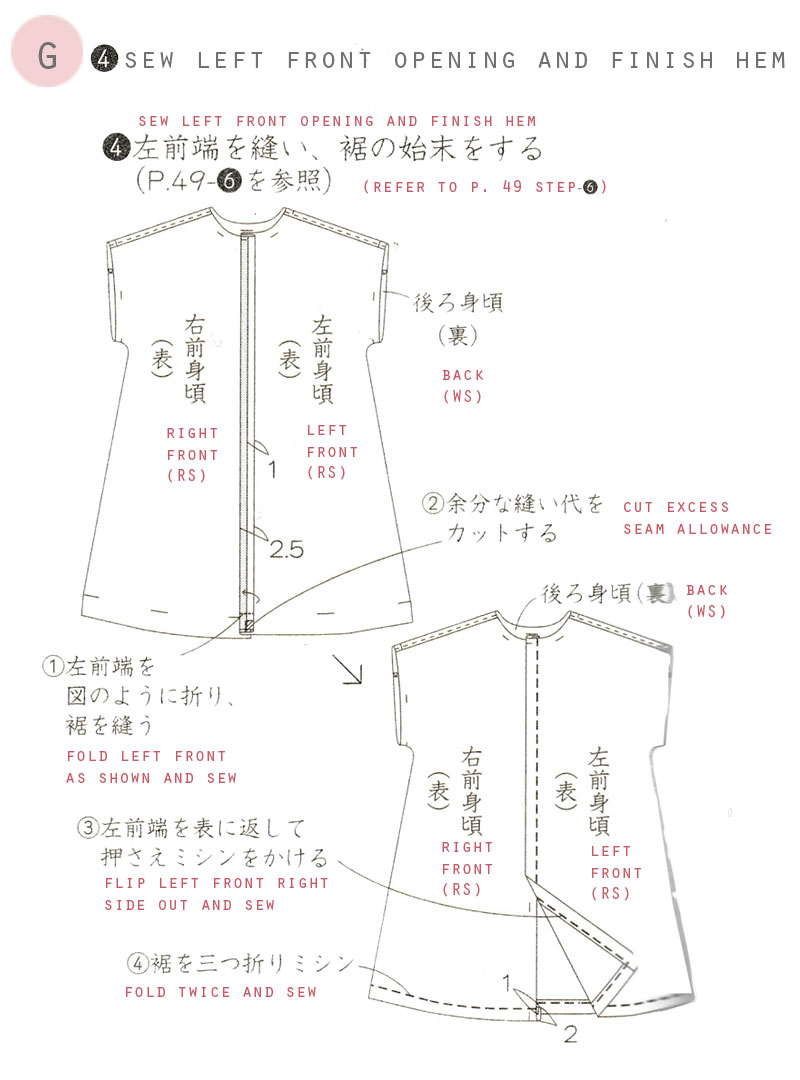
This wasn’t very intuitive for me at first. But I hope these photos will explain it better:
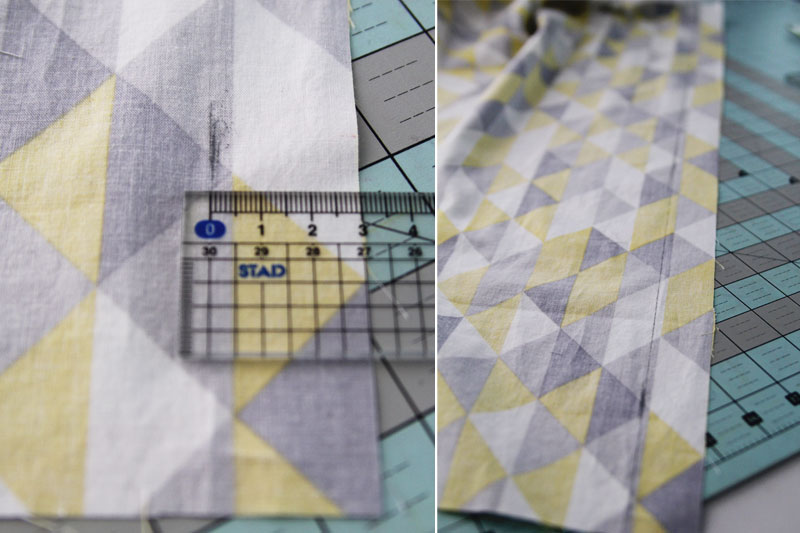
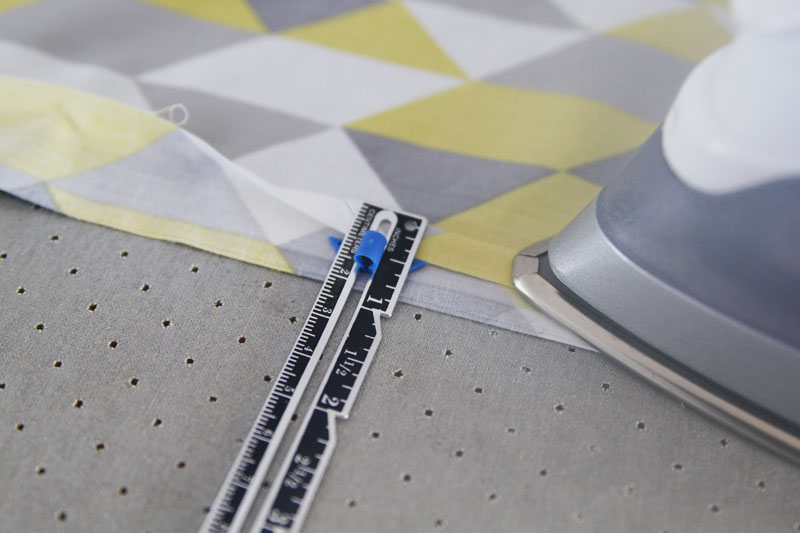
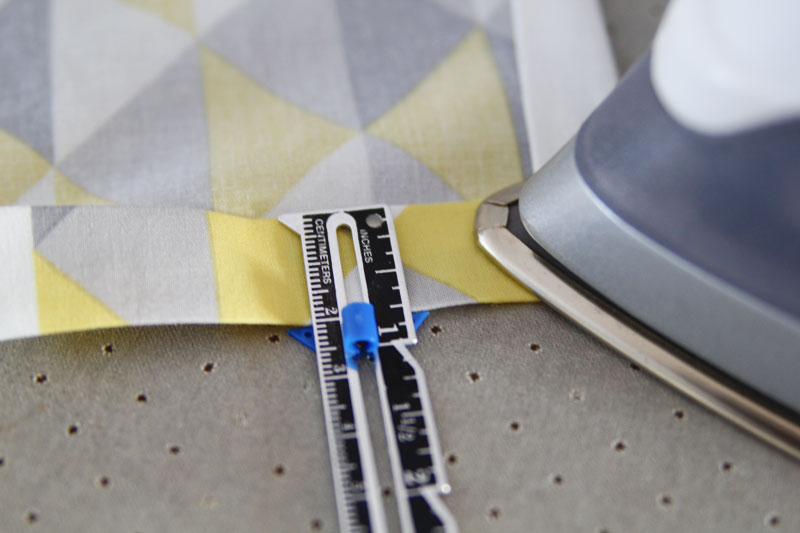
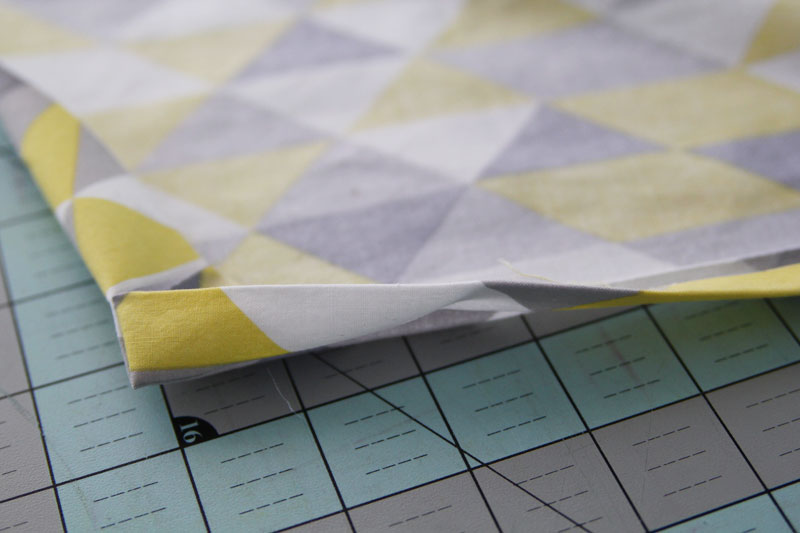
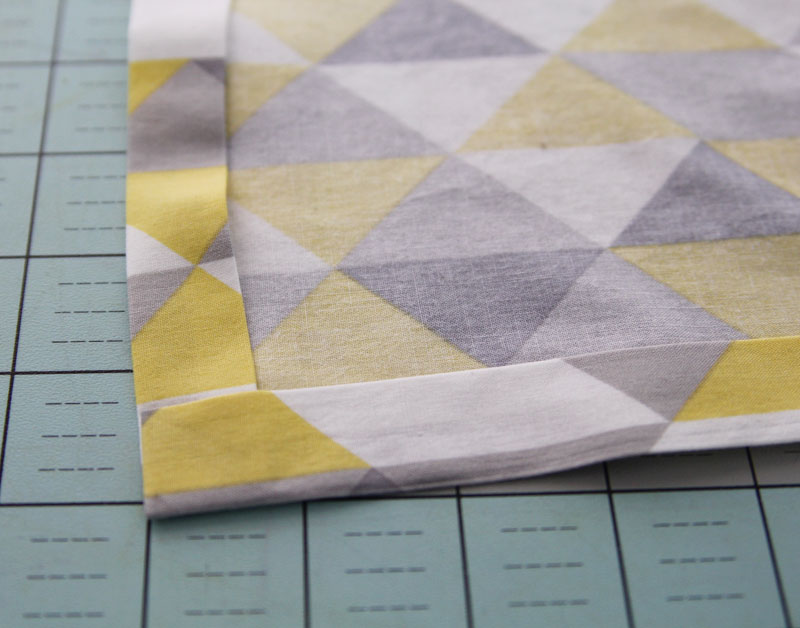
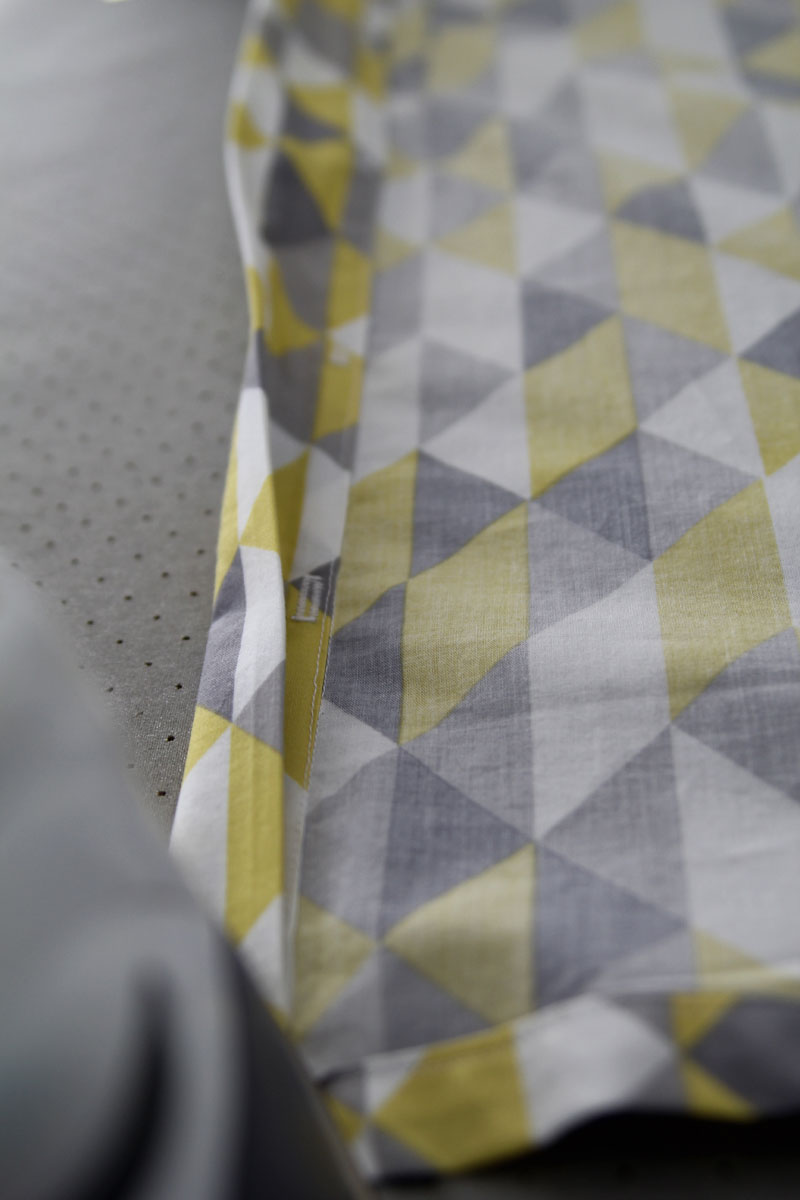
You’re basically folding the left opening edge 3cm toward the right side first (I drew a line on the wrong side of the fabric to help with the folding), then pressing a 1cm seam allowance back toward the wrong side. After sewing the top and bottom edge, you can now do a flip-a-roo for a nicely finished edge. Make sure not to cut too far into the seam allowance at the bottom there…you just want to reduce bulk. Once you flip-a-roo, press the flipped fold as well as the hem, then you sew the whole shabang from the top of the neckline all the way around the hem.
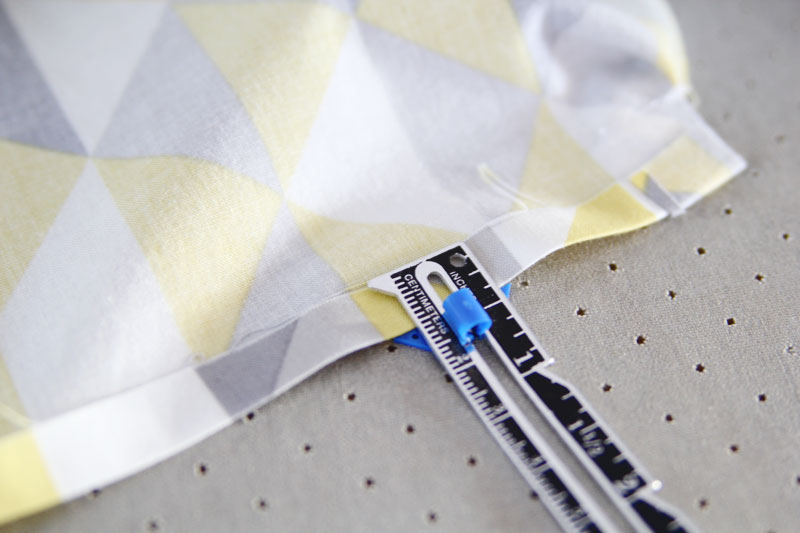
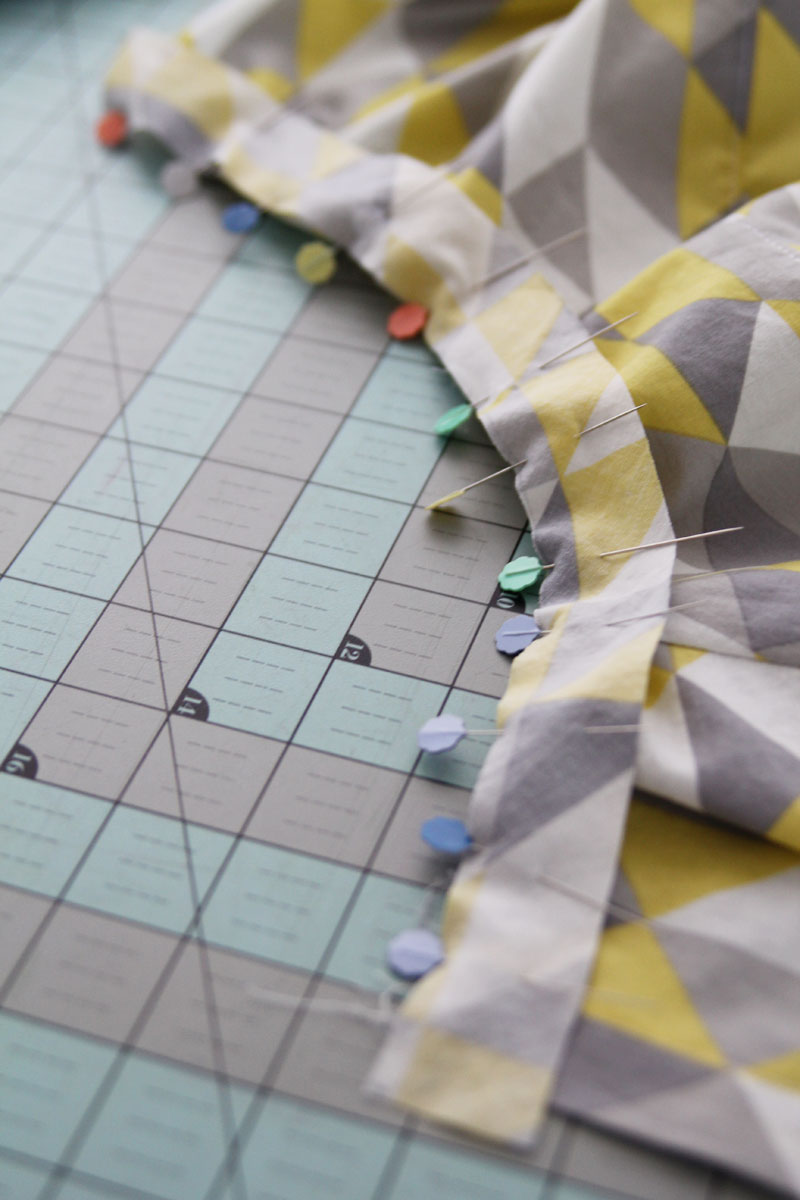
H – FINISH NECKLINE

I like to use a lot of pins for bias binding. I threw in the photo of trimming the seam allowance because it’s a step I always forget. In this case, I didn’t bother clipping the curves.

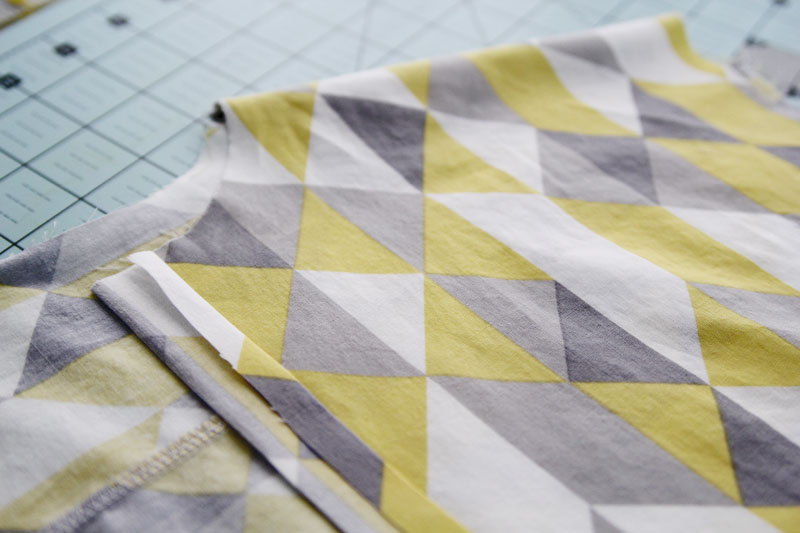
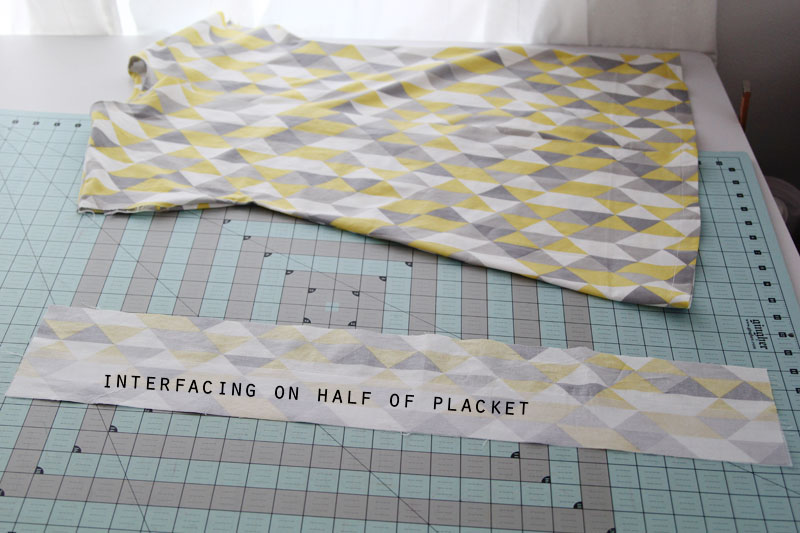
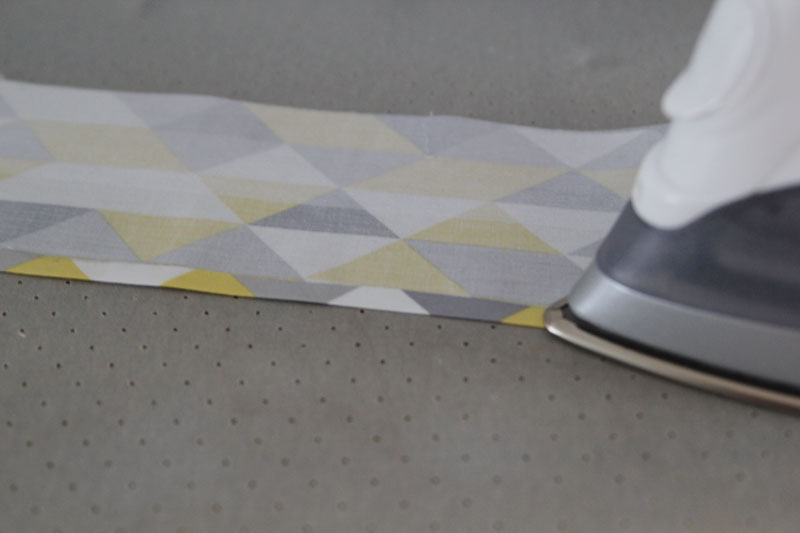
I – CONSTRUCT PLACKET
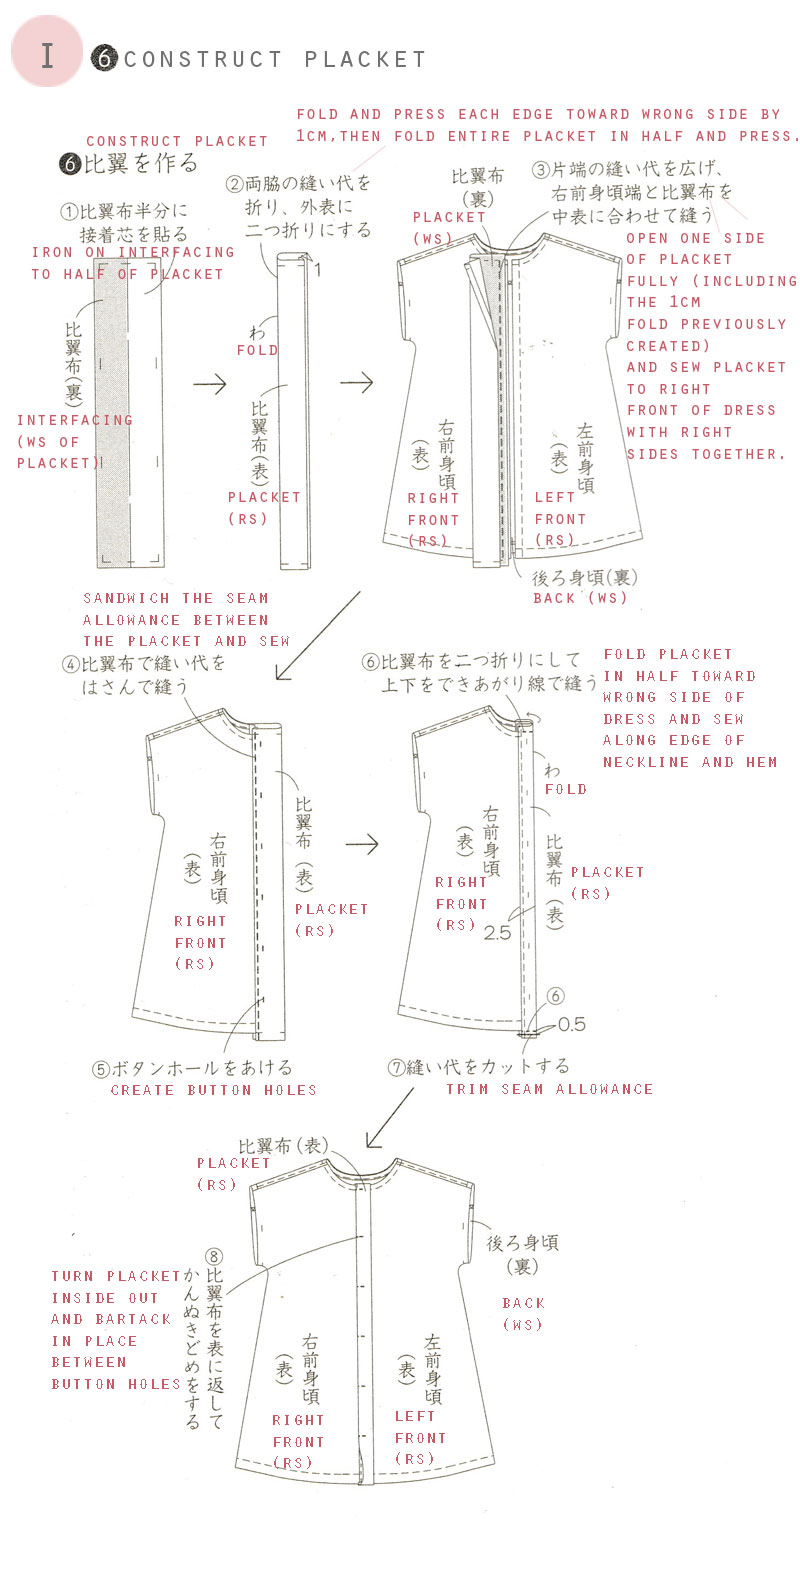
This one I did slightly incorrectly. I figured out that somehow I managed to switch the left and right fronts for my first version which is how I ended up with the asymmetrical placket. So if that’s the look you want, simply extend your right front pattern piece.
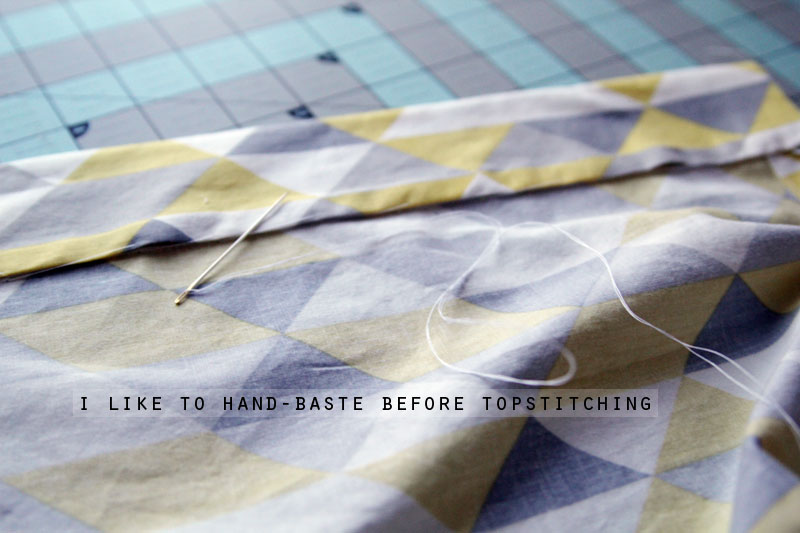
Note that I hand-baste the edge in place on the wrong side before topstitching. I end up saving time by taking this extra step because I inevitably mess up when using pins only.


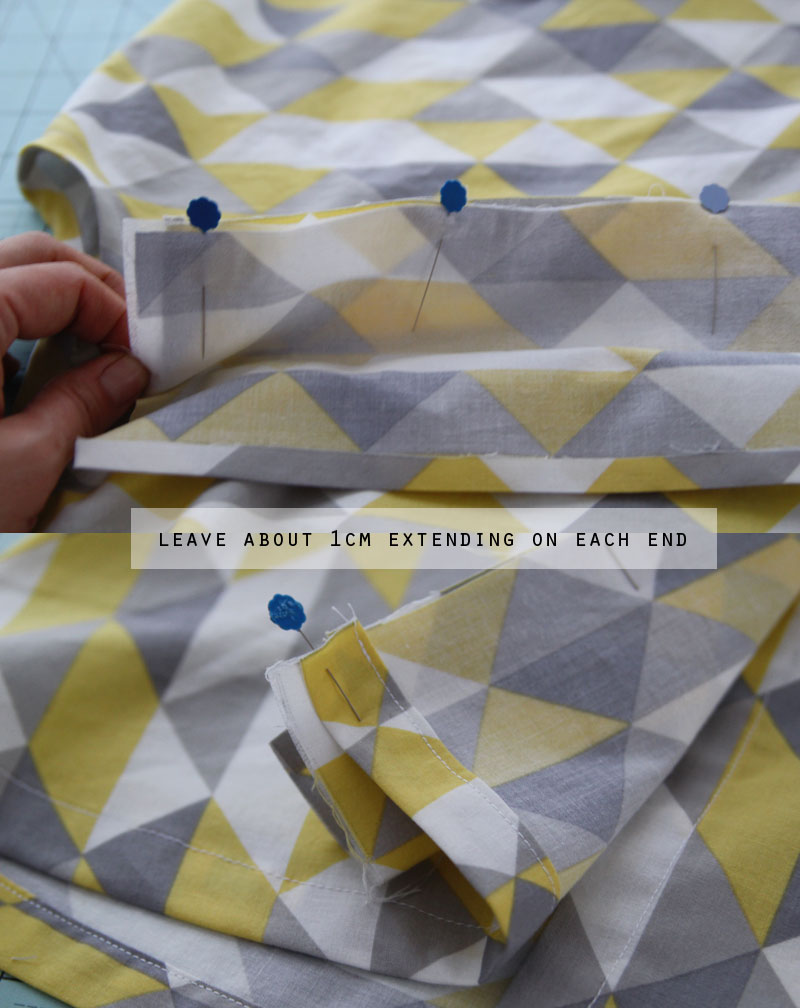
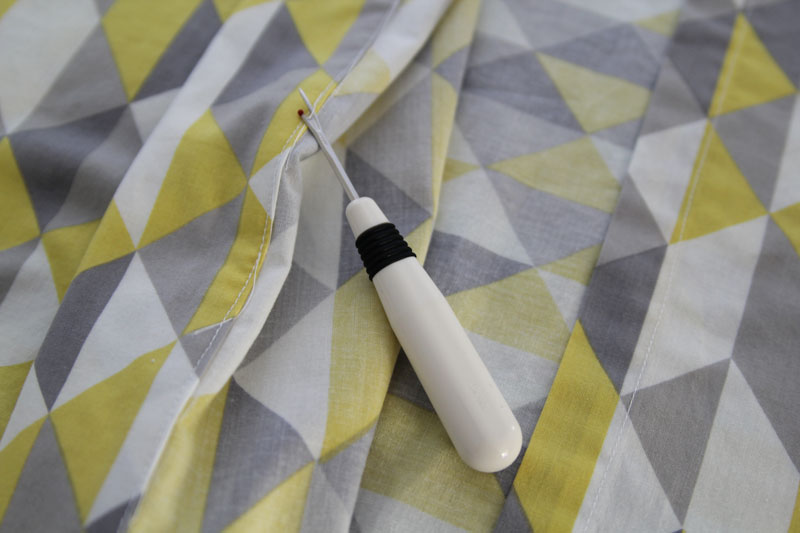

I should point out that the photos don’t show it well, but in the sections where you extended the 1cm on both the top and bottom ends remain extended until you fold the placket in half toward the wrong side. This is how the raw edges get hidden when you flip the placket so that the buttonholes are hidden beneath the placket fold.
Also, I didn’t include photos of bartacking the placket in place between the buttonholes — in fact, there were a whole lot more photos I wanted to include but it was starting to get ridiculous.
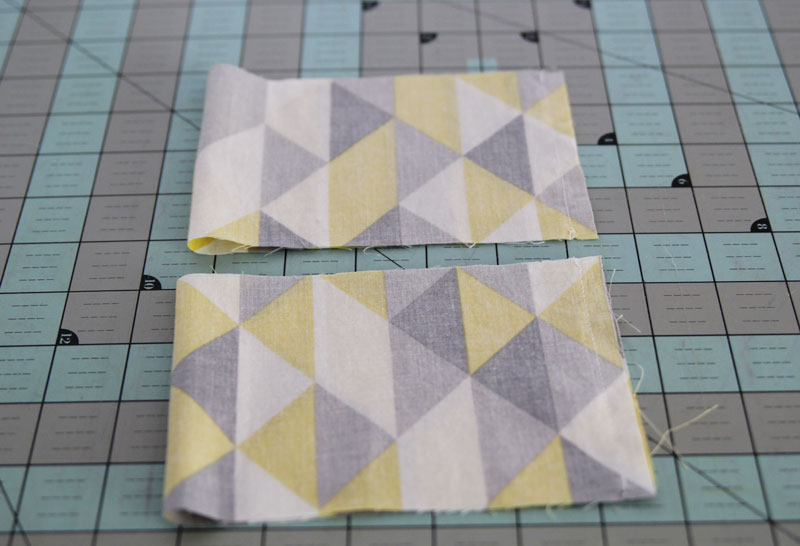
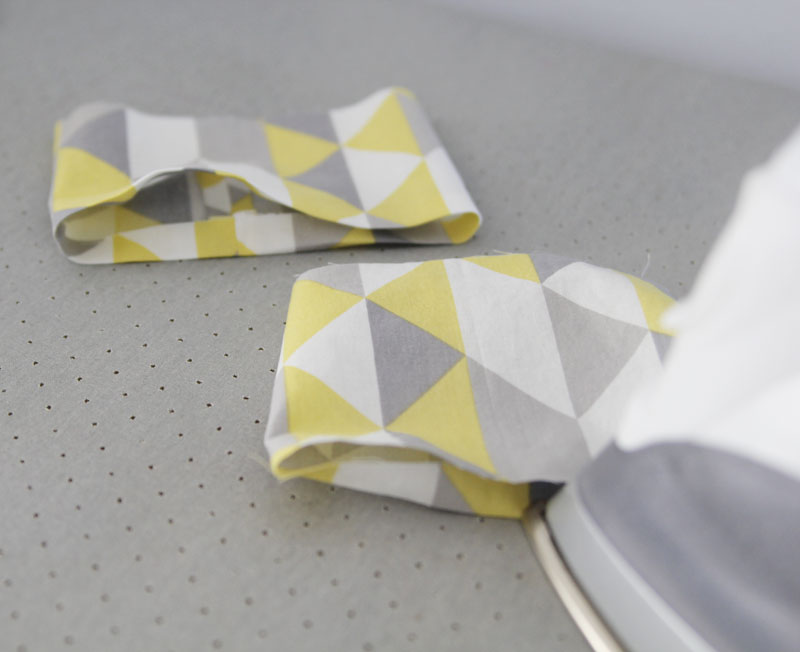
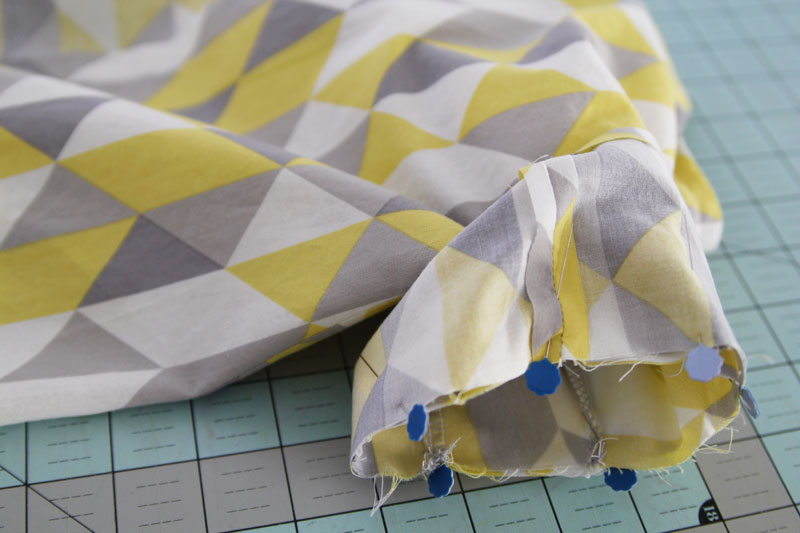
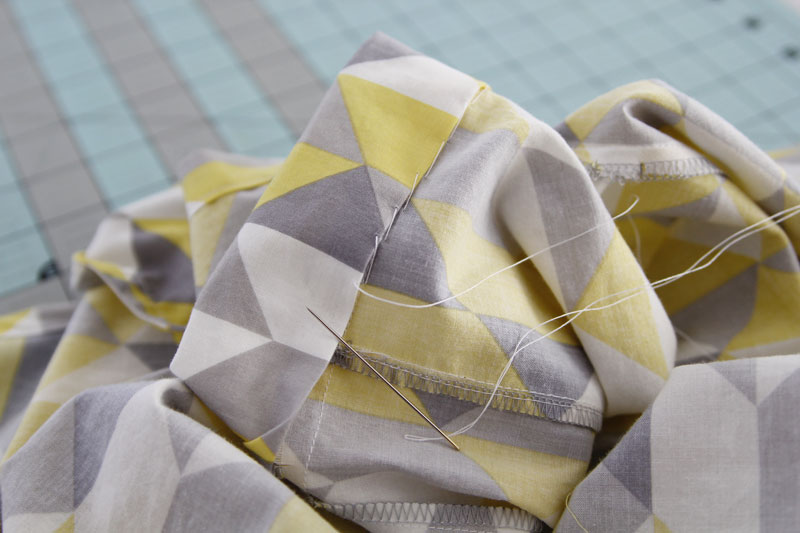
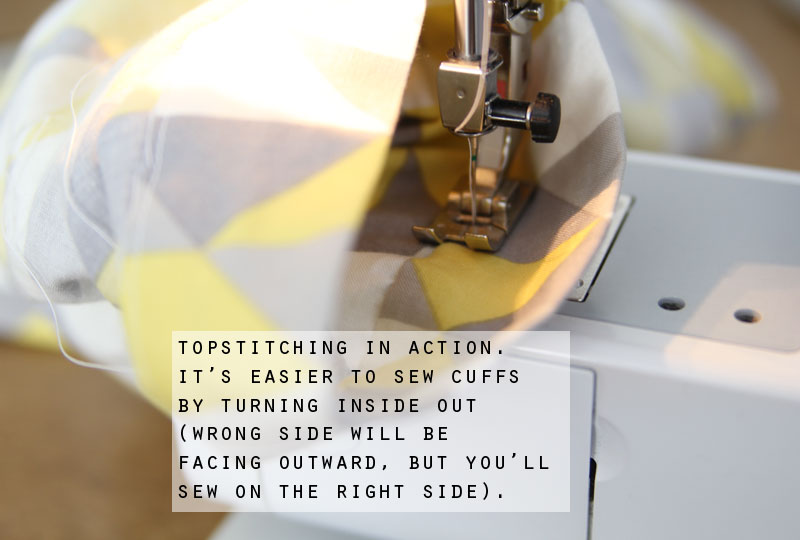
J – ATTACH SLEEVE CUFFS
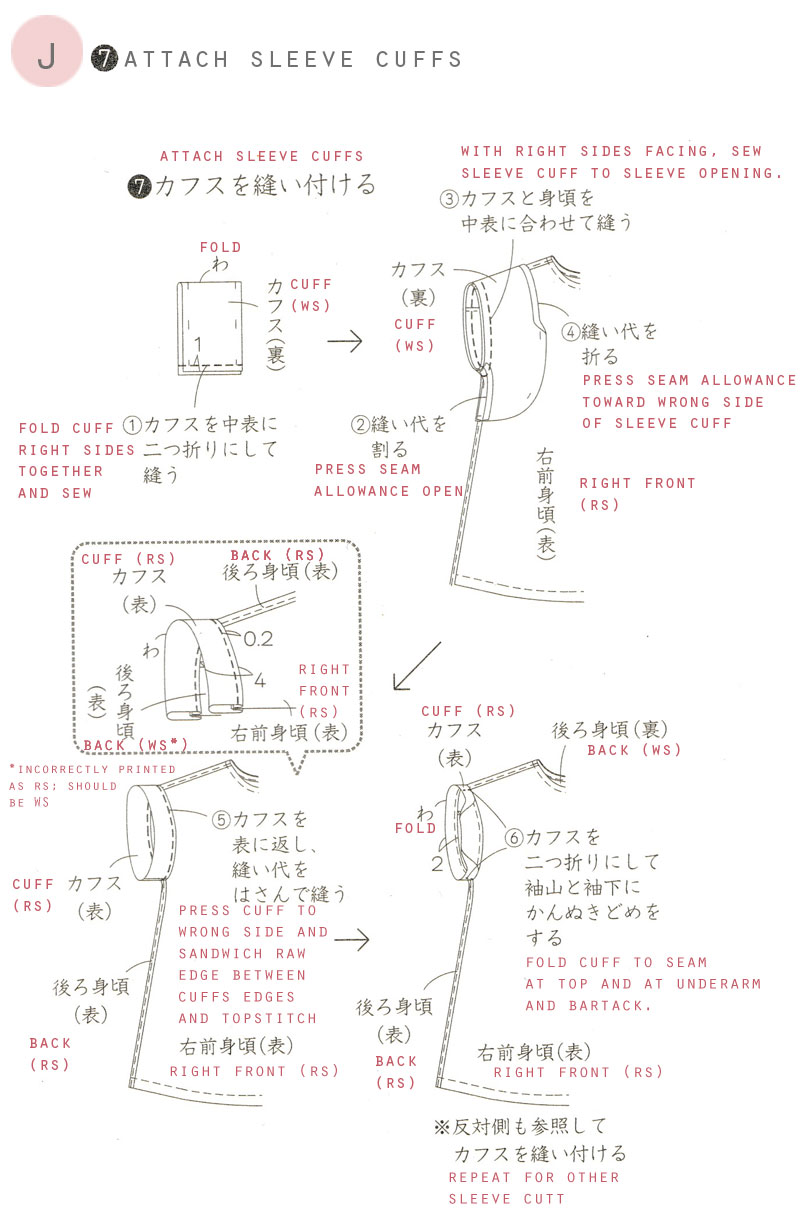
Like the placket, when I topstitch, I like to hand-baste on the wrong side to make sure I catch the edge in its entirety. No matter how many pins I use, I seem to always miss some spots.
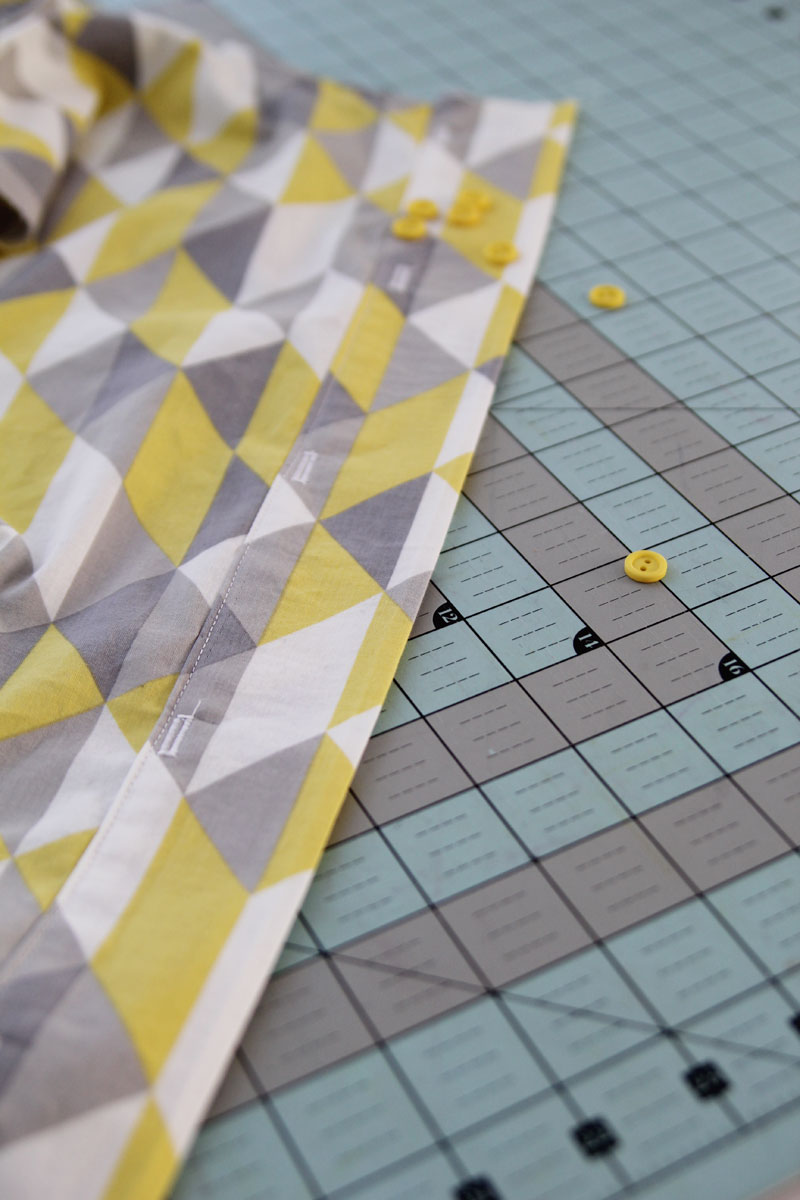
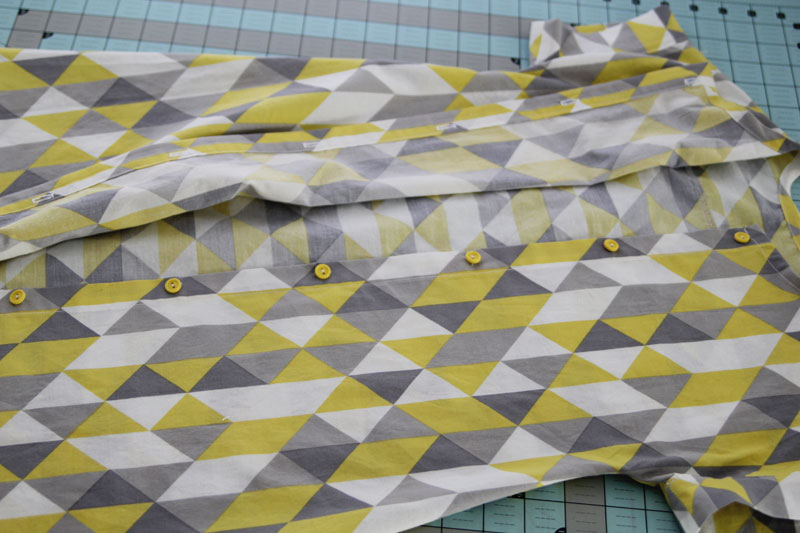
K – SEW ON BUTTONS
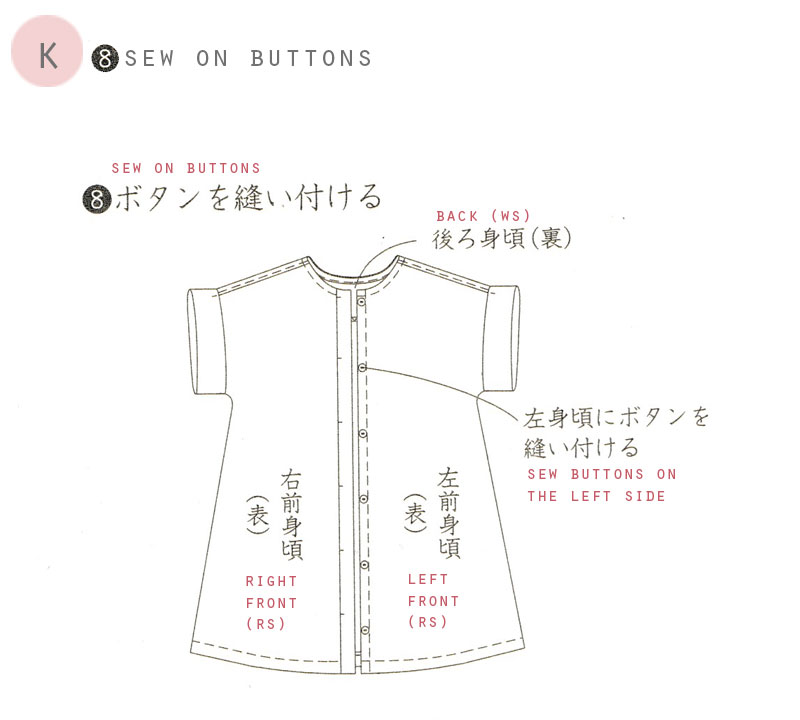
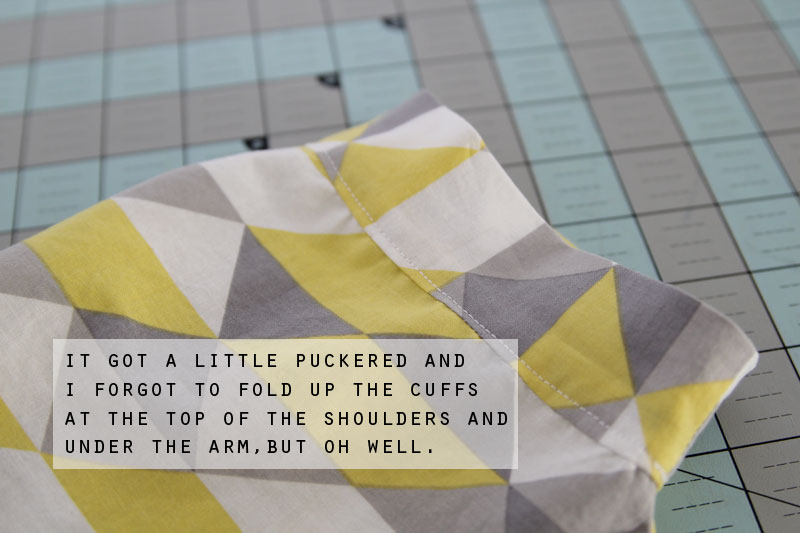
Final step! The pattern calls for six buttons, but I used seven. I never follow the instructions for buttons and determine the distance depending on the size of buttons I have available.
Fini! Was that helpful or just overwhelming?
This is so overwhelmingly helpful! And I finished reading the whole thing. As a matter of fact, I’m going to write down the translation on my book right now! Thank you thank you!
Hooray, I’m glad it’s helpful for you, Jing! You’re very very welcome 🙂
So wonderful Sanae. This tutorial will help me so much with all my sewing! Thank you for taking your time to explain the steps, with clear pictures.
I feel like I went a bit overboard with the photos, but being a visual learner myself, I figured it wouldn’t hurt to err on the excessive side:-) Thanks Greta!
Fantastic. I predict this will have a very long life being reblogged, pinned, etc., hopefully with the proper attribution!
That would be wonderful, Diana, though this was more of a challenge for myself. I don’t do tutorials often because they are definitely a time commitment, but I learned a lot through the process and I think I can streamline it. Thank you!
Have I told you before, Sanae, how amazing you are?! Probably, but it bears repeating. Thus . . . you rock! What a lot of effort/time you’ve put into this very detailed tutorial – and the photos are a HUGE help! A thousand times, thank you. And now I must get cracking and put my placket fears to rest and sew this dress already! My only issue right now is I”m trying to sew only from stash fabric for the next few months and I sadly have mostly 1 yard increments of fabric which are no longer big enough for size 120 cm dresses. I might need to make an exception for this one:)
Aw, my cheeks are burning, Lucinda! I know you’re a visual learner too, so I thought the photos would be the way to go to supplement the translated illustration. There’s absolutely no pressure for you to start sewing the dress right away, of course, because this tutorial will be up forever! 🙂
WoW, this is just excellent! I am sewing from Japanese boks for few months now and there is perfect Logic to them, isn’t there? That said, I get stuck on some steps (beginner level, what can I say) and this tutorial will be huge help! I also have that book, it is one of my favorites as well. I will print this post out so I can easily refer to it when I sew! Thanks à bunch!
Wonderful, glad it’s helpful Jelena!
Just sewed this dress and your tutorial was absolutely invaluable. Thank you SO much, Sanae! I’ve just blogged my version; it’s such a lovely dress (although mine is a little short, more like a tunic!)
I love finding out that my tutorials are actually beneficial! I had forgotten that I did this! Thanks, Marisa and your version is adorable :).